

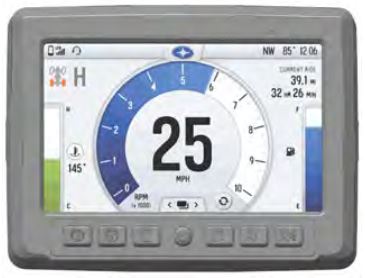
The seven-button, 7" Display powered by RIDE COMMAND, shown below, is equipped on some model year 2019 and newer Polaris Off-Road models.
For tutorial videos, visit the RIDE COMMAND website. For more on this display, read Guide to RIDE COMMAND for Off-Road Vehicles. Here are the answers to some frequently asked questions, by category.
AUDIO AND MUSIC
Q: How can I listen to audio using RIDE COMMAND?
A: You can listen to audio on RIDE COMMAND via AM/FM radio, Bluetooth®, Weather Radio or from a connected USB device. You can listen to audio through speakers, if equipped, or through a connected headset. For more information, read Playing Music with the 2019+ 7" Display Powered by RIDE COMMAND.
Q: What speakers work with the display?
A: MB Quart® and Rockford Fosgate® both make speakers that interface with RIDE COMMAND. See your Polaris Dealer or the Accessories section of the Polaris website for more information or to determine fitment.
NAVIGATION
Q: How do I start a ride?
A: The current ride is always being recorded when the vehicle starts moving at a speed of more than 2 miles per hour unless paused by the rider. A current ride ends and a new one is started automatically if the vehicle stops, is turned off for more than 4 hours or moves more than 1 mile while keyed off (i.e. it has been trailered to another location). Any additional stopped time at the end of a ride should be clipped when saved. To end a ride and start a new one, tap SAVE AND START A NEW RIDE. After a ride ends, it is automatically saved to the rides list and named "Ride on" + the date. Note: Any auto-completed ride shorter than a half-mile will be automatically discarded unless manually saved.
Q: Can I plan a ride on the RIDE COMMAND website and upload the planned route to my display?
A: A ride can be planned on the RIDE COMMAND website, downloaded to a USB drive and then uploaded to your vehicle's display. More information can be found in Planning and Uploading a Ride with RIDE COMMAND and Syncing RIDE COMMAND Data.
Q: How can I see previous waypoints and add new ones?
A: To add a waypoint, you will select the Navigation button on the display. From there you will select the Navigation Menu on the screen. This will pull up the options to see the legend for the trails displaying on the map, see previous waypoints, add waypoints, see previous rides, record rides and add Group Ride features. To add a waypoint, select ADD WAYPOINT on the screen. To edit the waypoint, select the pencil icon and change the name of the waypoint. You also can change the color of the waypoint by selecting the waypoint icon directly to the left of where you entered text to name your waypoint. Tap the waypoint for color options.
Once you have your waypoint named and color chosen, select the CONFIRM button in the bottom-right-hand corner of the screen. The waypoint will drop on the map. If you select that waypoint, the menu options will appear as they did when you first added it. Select the button on the bottom left of the waypoint menu to navigate to the waypoint selected. You will not get turn-by-turn directions to that waypoint, but it will tell you the general direction to travel.
Q: When will trail data be available for my location?
A: RIDE COMMAND only shows vetted and official trails. This means RIDE COMMAND relies on relationships with associations and clubs to build out our trail network of legal places to ride. We currently are working on building our relationships in underrepresented areas and hope to have more trail coverage soon. At this time, we cannot provide a date on when trail coverage will be available for a specific area.
CONNECTED DEVICES
Q: How many devices can be connected to a vehicle at one time?
A: One headset and one cellular device can be connected to your vehicle synchronously.
Q: What kind of headset will connect to RIDE COMMAND?
A: Check the Supported Devices to see what headsets are officially supported by RIDE COMMAND. Other headsets may work with RIDE COMMAND, but they have not been tested and, therefore, support cannot be offered for them.
Q: How to do I connect my SENA® headset to RIDE COMMAND?
A: Follow the SENA® instructions on how to pair your headset so you are able to communicate with other riders. Select the Phone icon on the display. Select the headset option to connect to. This will vary based on which SENA® headset you have. You want to get to “Configuration” on your headset. Your headset should tell you that you are in “Phone Pairing Mode.” Phone Pairing Mode is the mode required to connect the headset to RIDE COMMAND. You will then select OK on the display. The headset will display on the screen, and you will have to hit the "+" sign to add it. The display will confirm when the headset is connected.
For more information on this procedure, please refer to your SENA® headset manual or read Connecting Bluetooth® Devices to the 2019+ 7" Display Powered by RIDE COMMAND.
RIDE COMMAND
Q: How do I connect my vehicle to Wi-Fi (if equipped)?
A: Model 2019 and newer vehicles that are equipped with Wi-Fi capabilities can be connected to a Wi-Fi network. To connect your vehicle to Wi-Fi, you must have the RIDE COMMAND update from October 2020 or later. For further instructions, read Connecting Your Vehicle to Wi-Fi.
Q: Where can I find out more information and details about the Polaris RIDE COMMAND system?
A: You can find more information about Polaris RIDE COMMAND at ridecommand.polaris.com.
Q: How do I import and export rides from RIDE COMMAND to my computer?
A: Read Syncing RIDE COMMAND Data for your options.
Q: How to I create a Group Ride on RIDE COMMAND?
A: Group Ride can connect vehicles and riders with the display powered by RIDE COMMAND, the Polaris App and/or the Vehicle-to-Vehicle Antenna. More information can be found in Using Group Ride powered by RIDE COMMAND.
Q: Do I need to have the in-vehicle display to use the Polaris App and RIDE COMMAND features?
A: No, you do not need the display to use the Polaris App.
Q: Will the Group Ride tracking feature still work even if I do not have the in-vehicle display?
A: Yes, if you have the free Polaris App, the Group Ride feature will work. Group Ride will not work if you do not have a cell phone signal. More information can be found in Using Group Ride powered by RIDE COMMAND.
Q: How do I update my display?
A: You will update your display by going to the RIDE COMMAND website. Visit the update section of the website. It is recommended that you update the RIDE COMMAND software and maps every 90 days. For update instructions, read Updating Software and Maps on the 2019+ 7" Display Powered by RIDE COMMAND.
To browse all RIDE COMMAND articles, read Guide to RIDE COMMAND for Off-Road Vehicles.
Visit the RIDE COMMAND website for additional information about features, displays and software/map updates.
Bluetooth® is a registered trademark of Bluetooth Sig, Inc.
MB Quart® is a registered trademark of Maxxsonics USA Inc.
Rockford Fosgate® is a registered trademark of Rockford Corporation
SENA® is a registered trademark of SENA Technologies, Inc.
Unless noted, trademarks are the property of Polaris Industries Inc.
© 2023 Polaris Industries Inc.


