

You can plan a ride on your vehicle's display, on the Polaris App, or on the RIDE COMMAND website.
Ride Planning on the Website
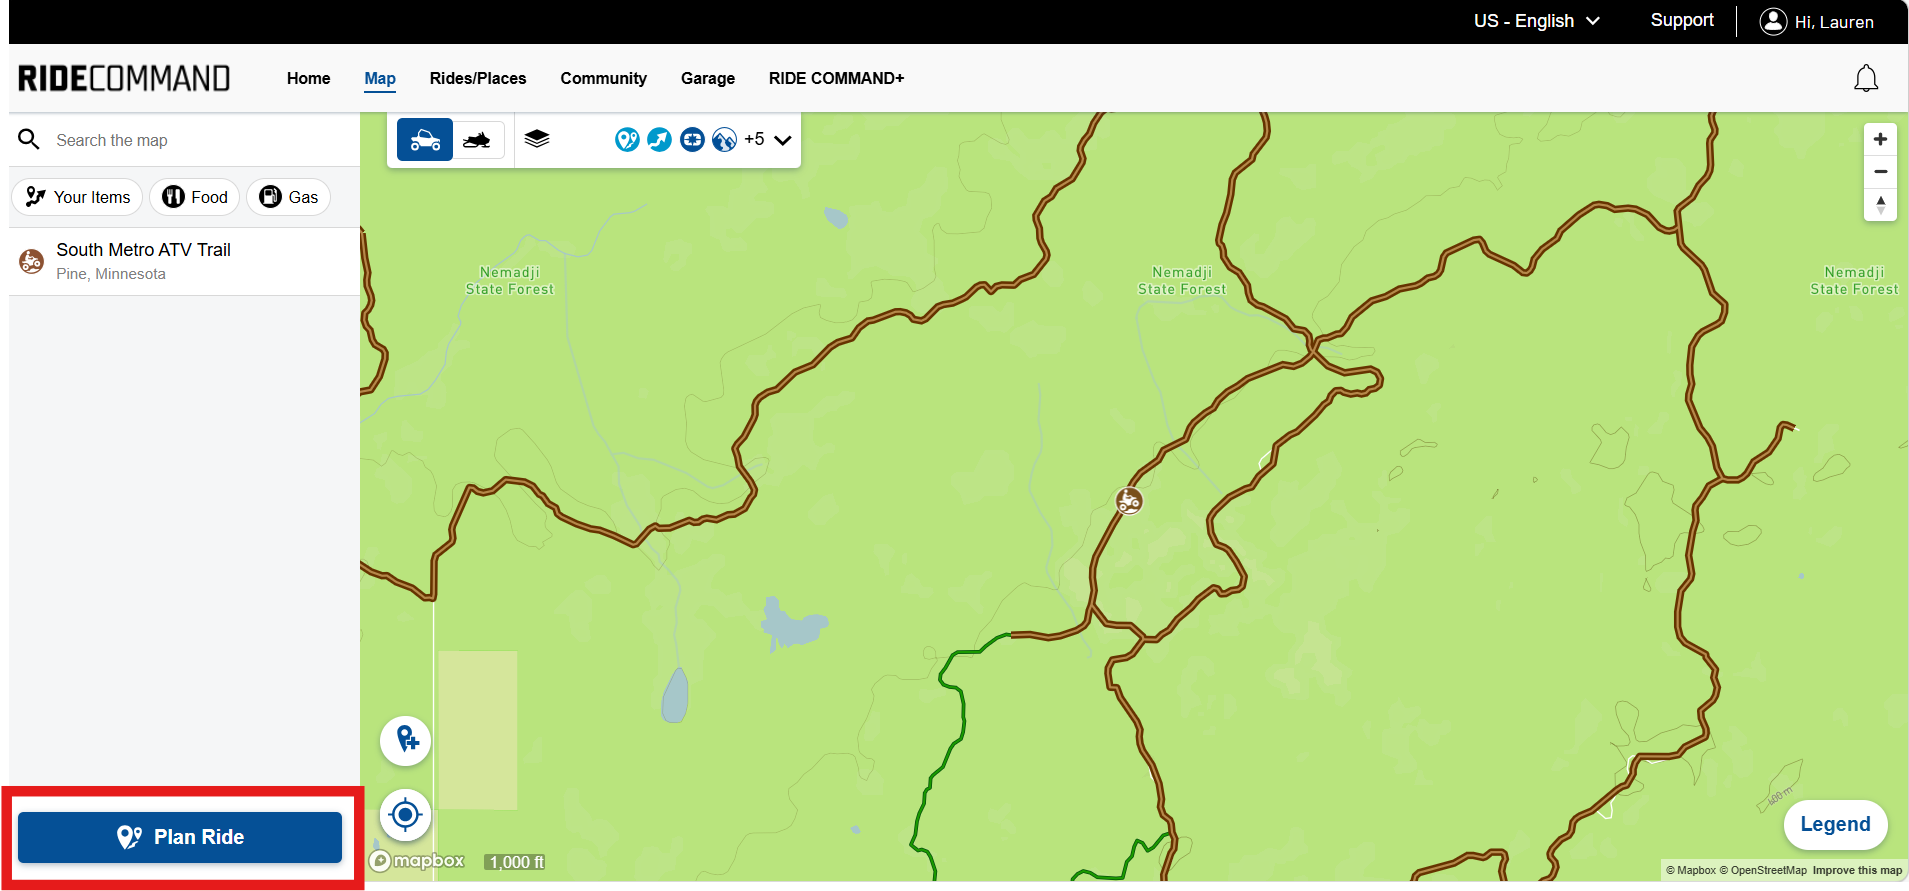
1. To plan a route, visit the RIDE COMMAND website on a computer.
2. Log in to your Polaris account.
3. Navigate to the MAP tab.
4. Select PLAN RIDE from the left side of the screen.
You can also plan a ride by navigating to the RIDES/PLACES tab, navigating to the ROUTES tab, and selecting PLAN RIDE.
5. Select the trail type.
- For Off-Road trails, you can pick trails specific to your vehicle or select "All Off-Road Trails."
- For Snow trails, all trail types are selected by default.
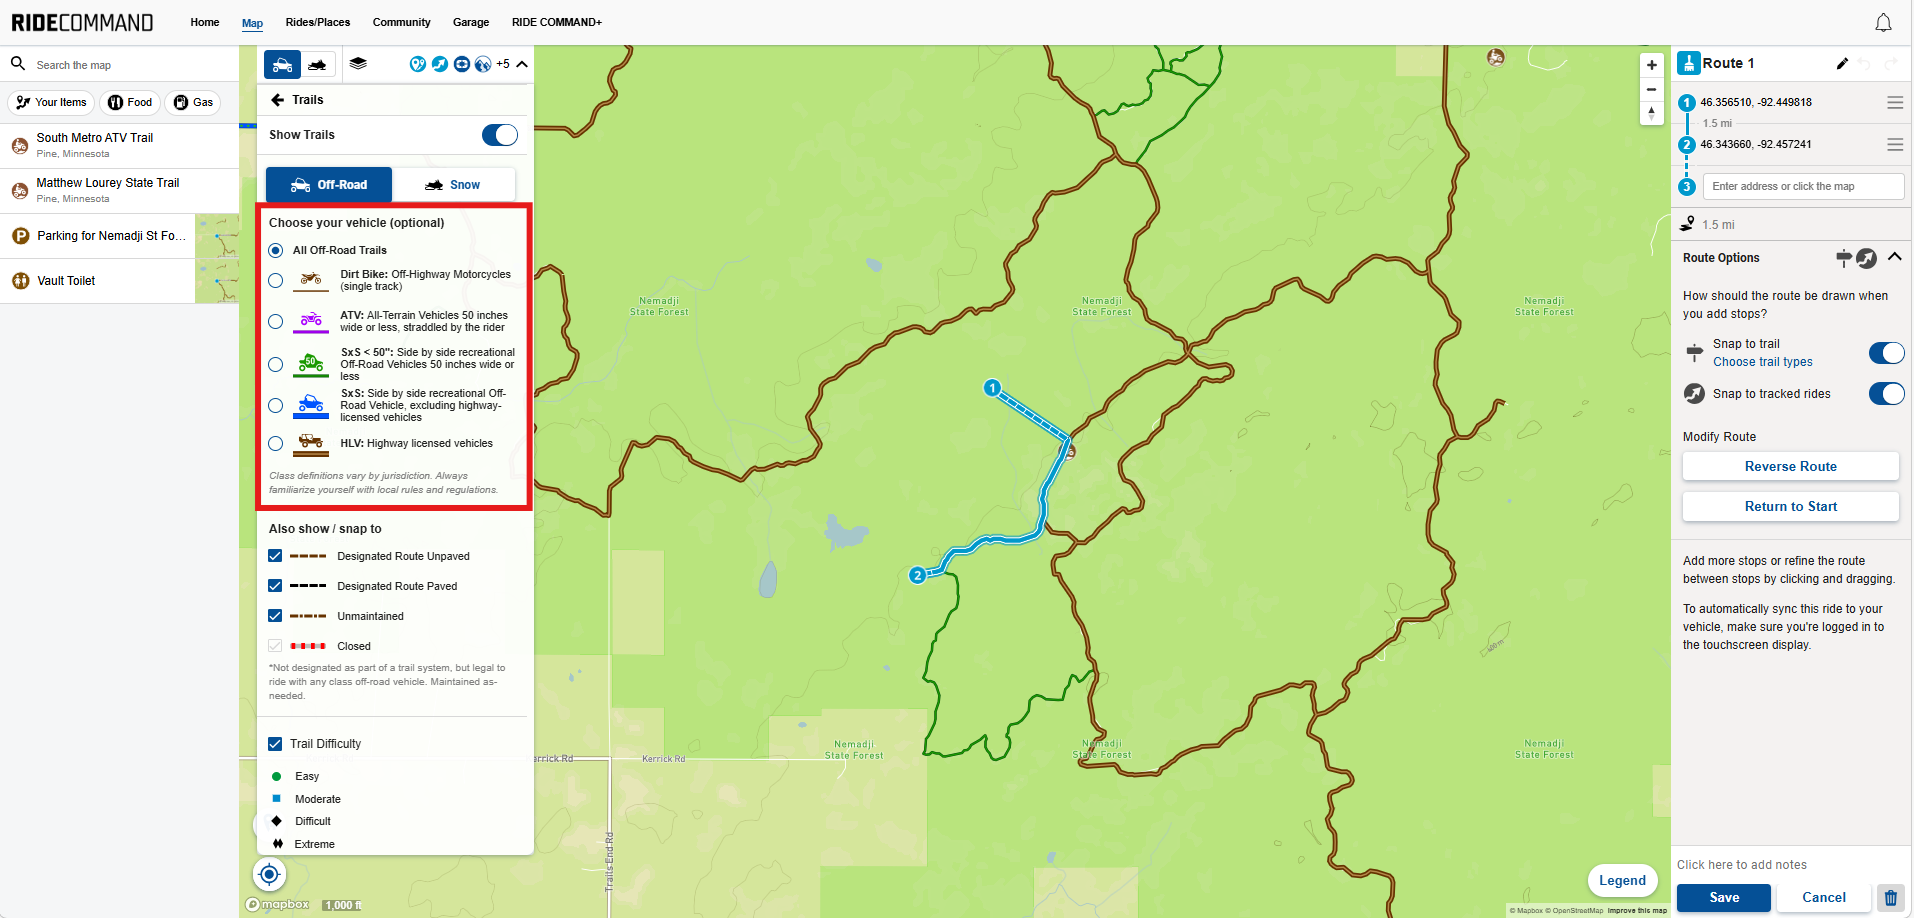
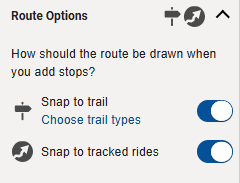
Note: Be sure the "Snap to Trail" option (shown below) is enabled unless you wish to plan the route manually.
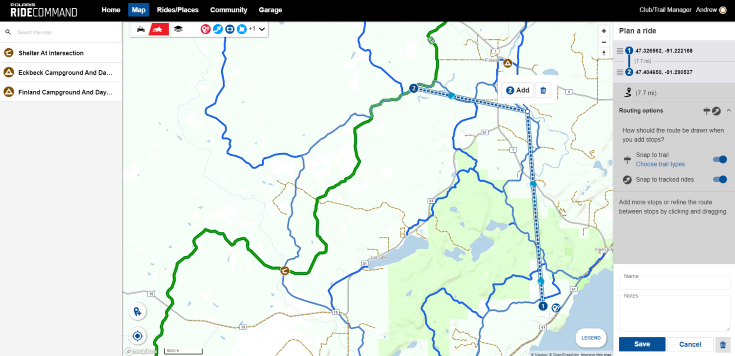
6. Find the desired trail or ride area and click on the map to add your starting point (1). Note: Start and end points can be on or off the actual trail, but they must be within 500 meters of a trail for routing to work. After the starting point has been placed, the user can add a second point by clicking on the desired location on the map.
Once tapped, you can move the point by clicking and dragging it.
When you stop moving the point, the screen will show a dashed line with spinning icons that indicate the route is being generated.
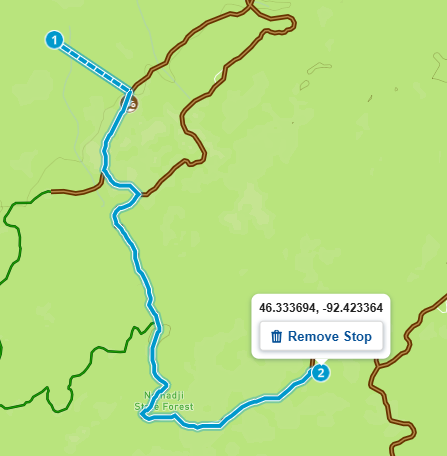
RIDE COMMAND will show the optimal route between the two points and will automatically set a point. To remove a point/stop, hover over it and select REMOVE STOP. You can then re-select your point/stop as desired.
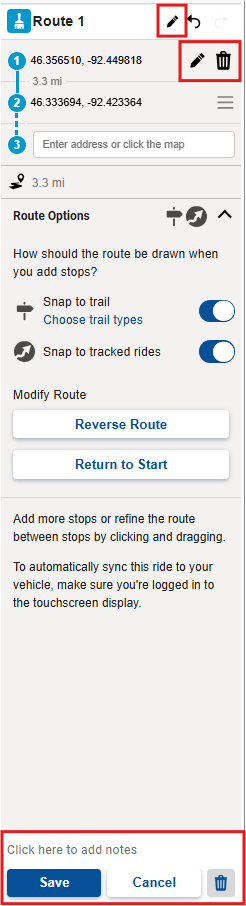
7. From the menu on the right, you can edit or delete a point/stop using the pencil and trash icon buttons, name the ride via the pencil icon next to "Route 1", and reorder points by dragging and dropping to rearrange their order in the list. This is also where you can add notes and save the planned ride at the bottom.
8. Public points, custom points, areas and tracked rides can all be included in the route. To use a public point, click on the it and click "ADD STOP."

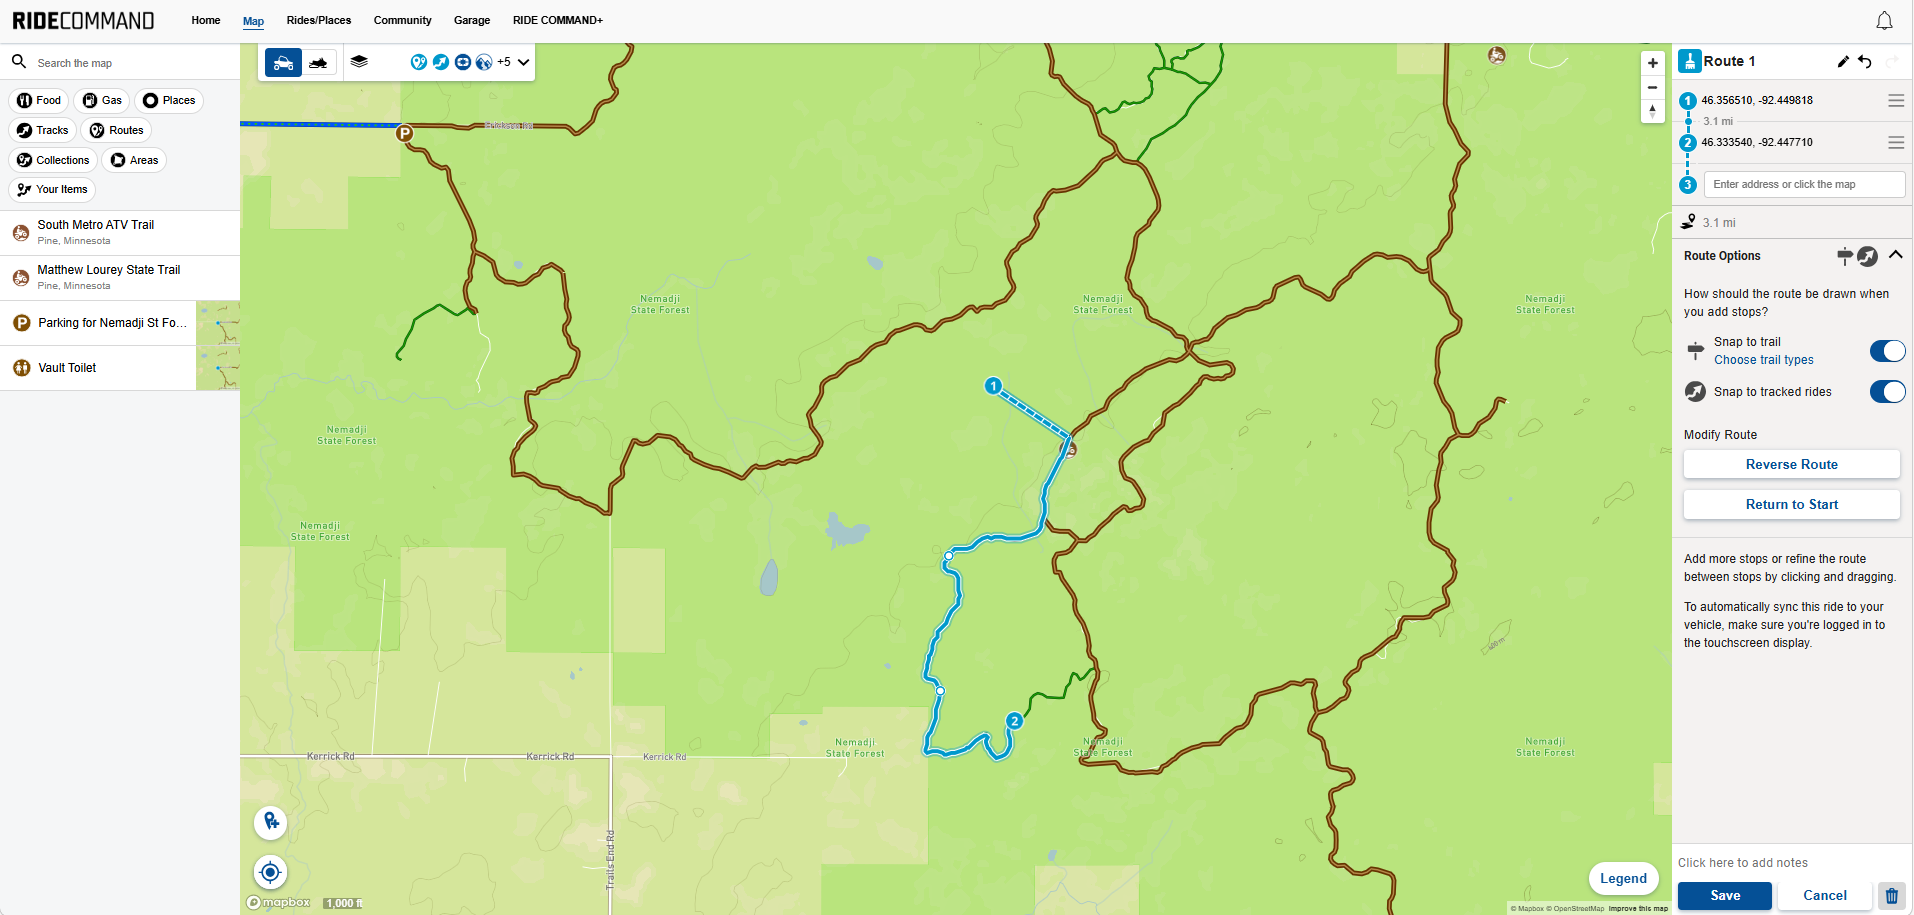
9. Once two or more waypoints have been added, you can adjust the route to take different paths to the desired waypoint. To do this, click on the route between the two waypoints and drag the dashed line to the trail segment you want to use.
This will create a control point that will trigger RIDE COMMAND to recalculate the route. The control point (white dot) can be moved again if you would like to see other routing options.
10. Once satisfied with your route, name it, add any notes and click SAVE.
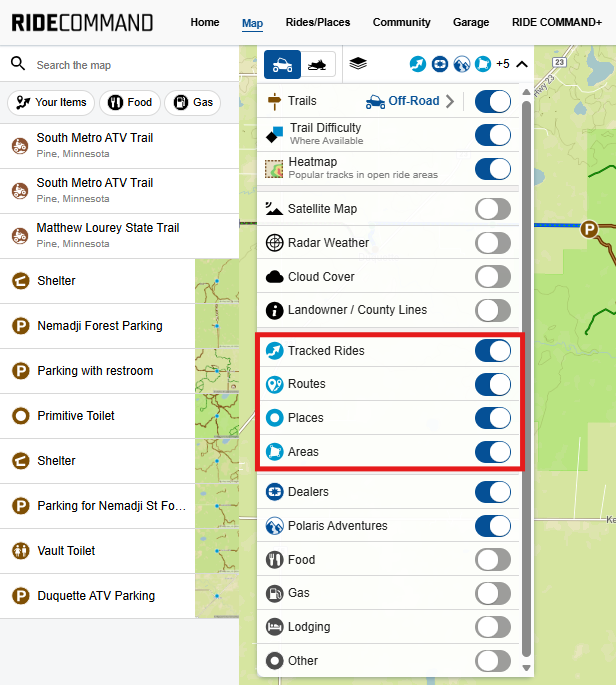
Once your ride has been planned, you can choose whether to show or hide it on the map. To hide the planned ride from the map, navigate the MAP tab and expand the drop-down menu. To hide planned rides, toggle the switch next to Routes. To hide other elements like tracked rides, saved places (waypoints) and areas, toggle the slider next to the element you wish to hide.
Ride Planning on the App
1. Open the Polaris App and log in to your account.
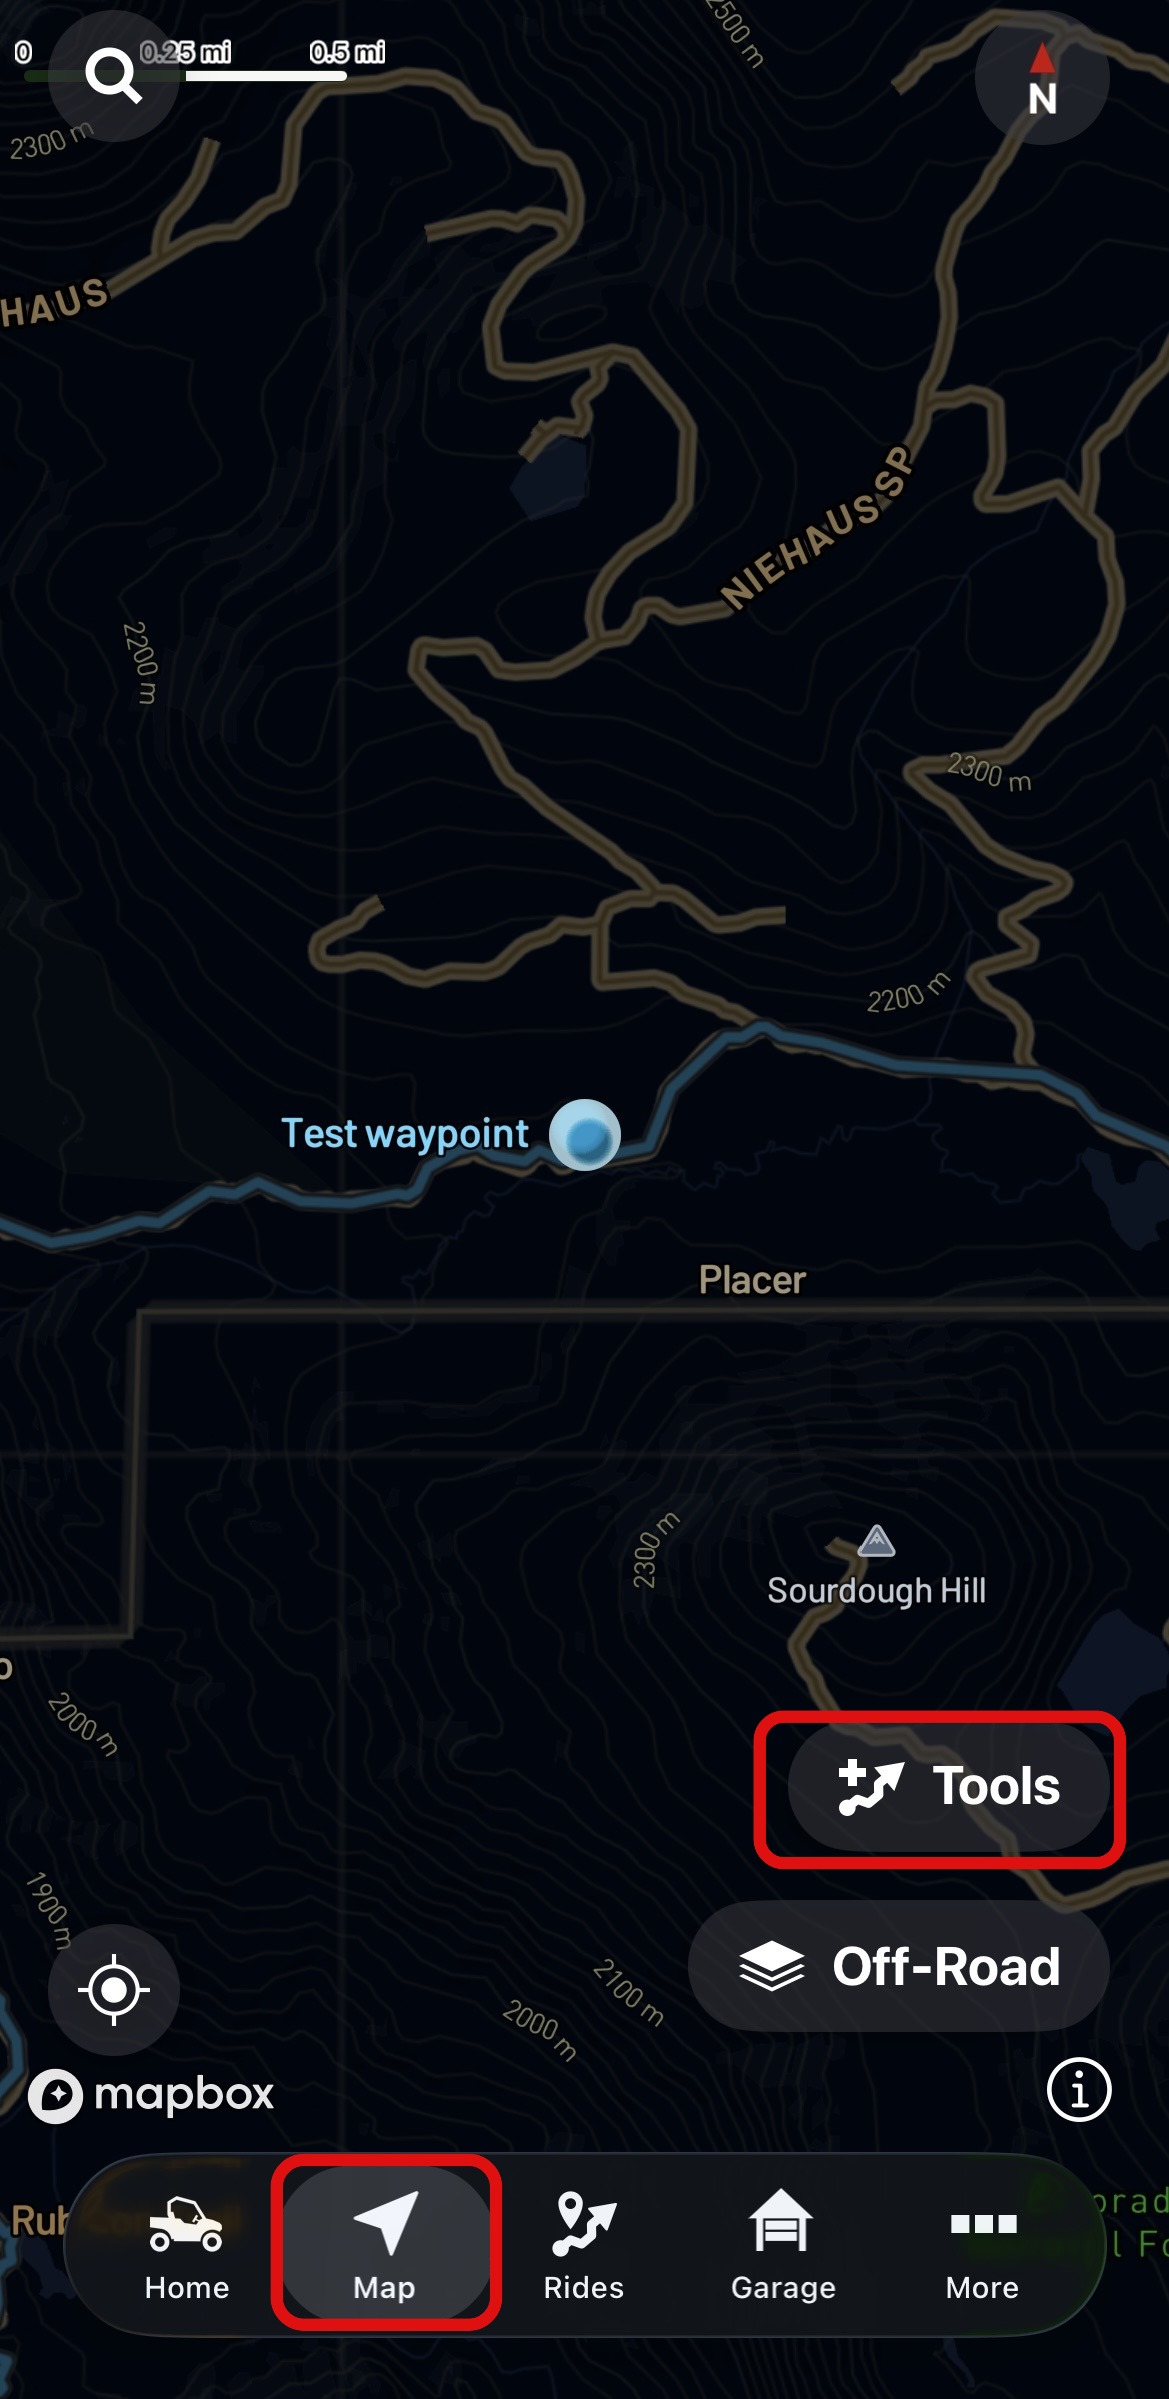
2. Once logged in, navigate to the Map page. Select TOOLS.
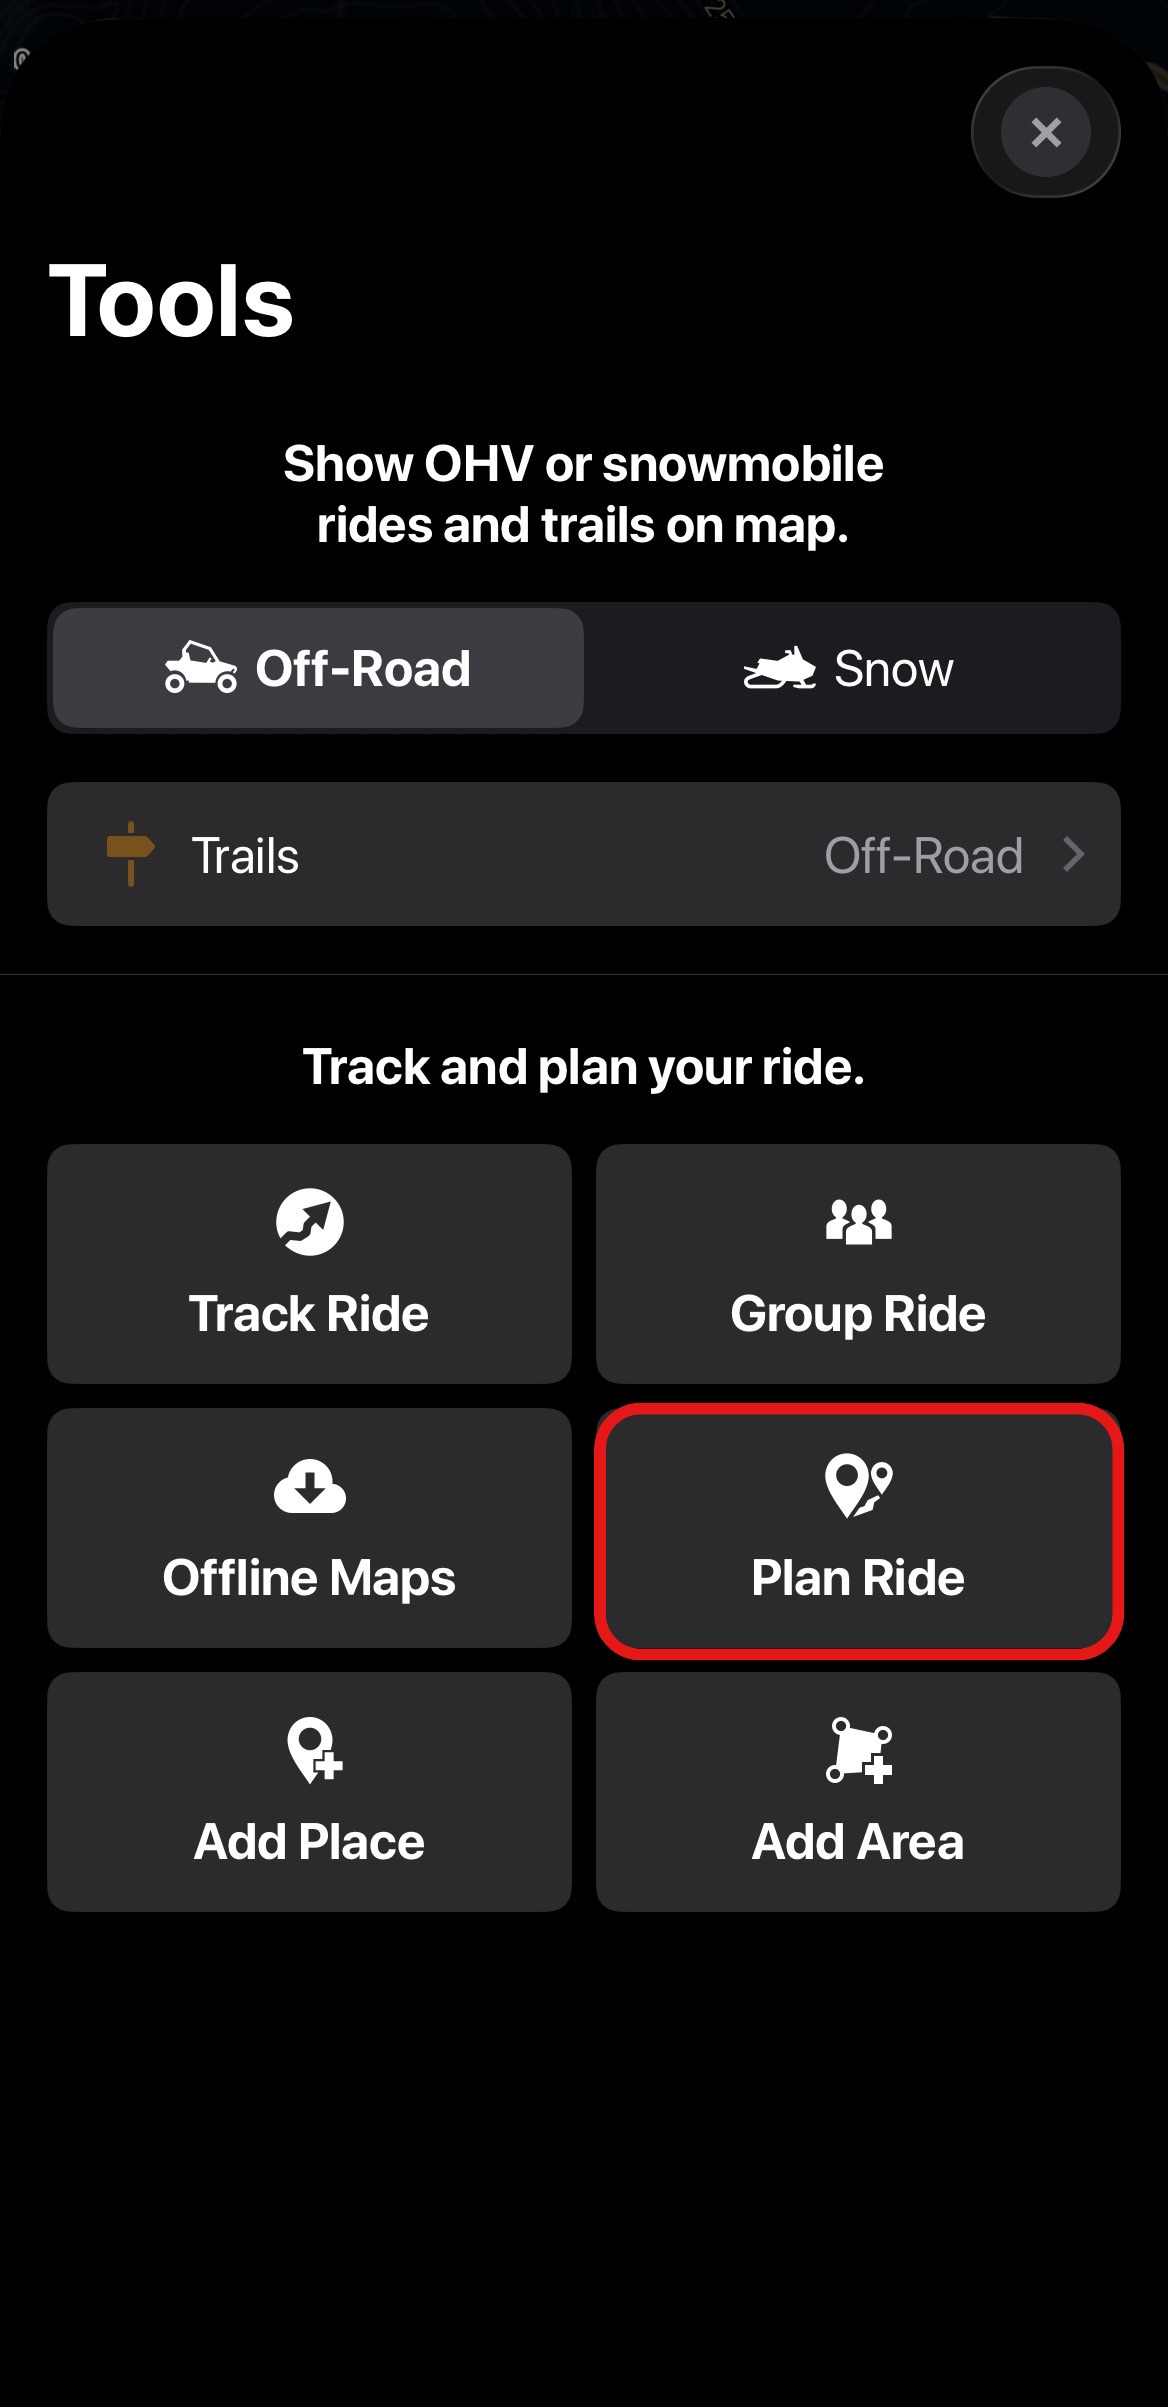
3. Click PLAN RIDE.
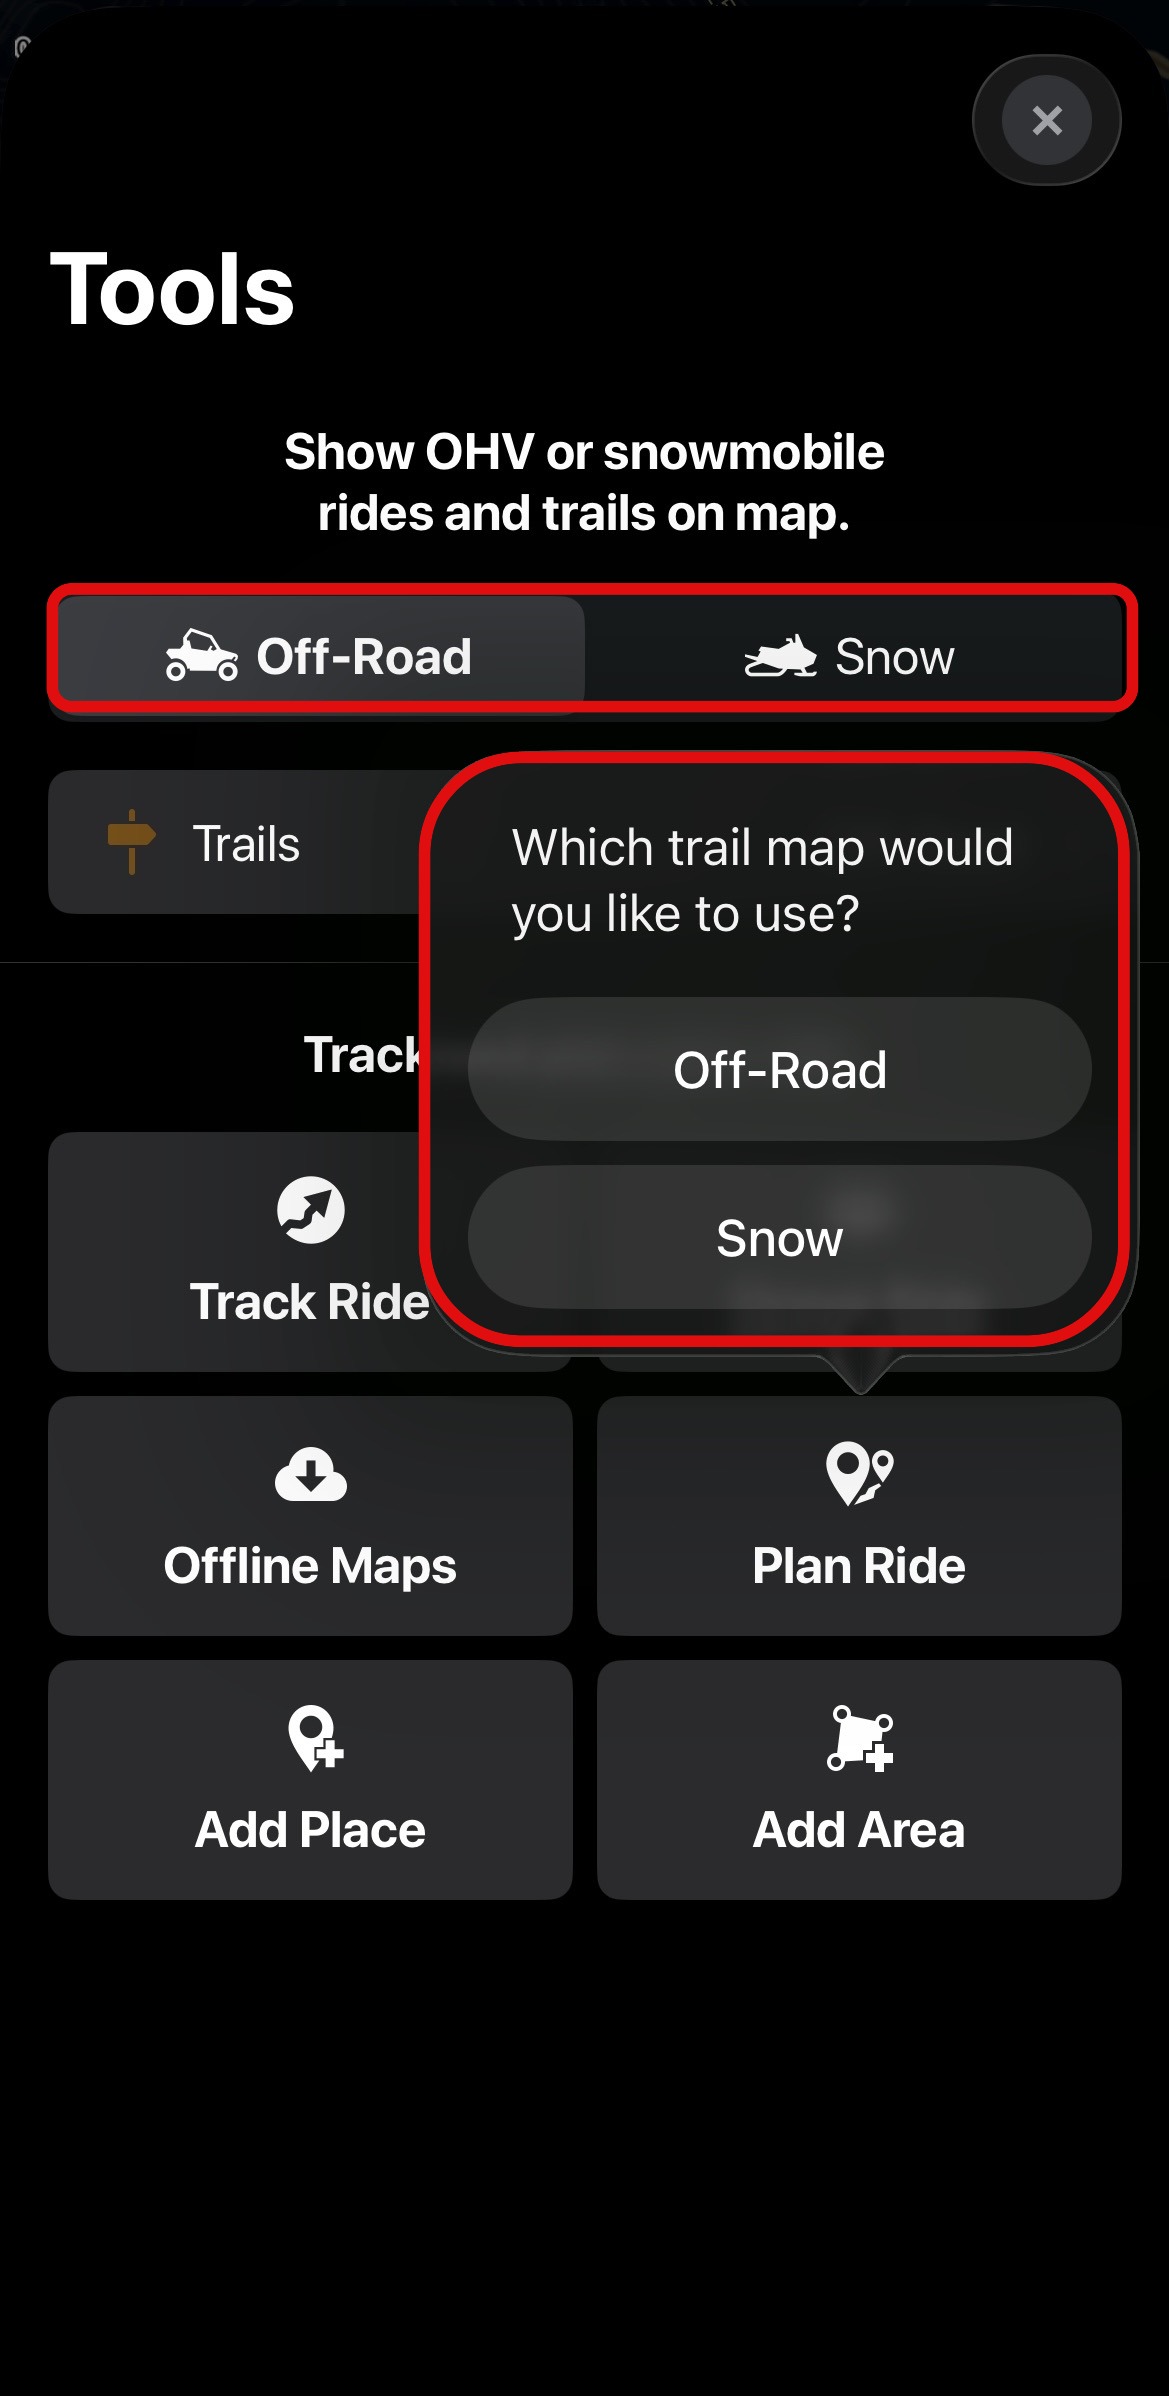
4. Select the trail type: Off-Road or Snow. This can be done via the tiles at the top, or via the pop-up prompt after selecting "PLAN RIDE".
For Off-Road trails, you can pick trails specific to your vehicle, or select "All Off-Road Trails." For Snow trails, all trail types are selected by default.
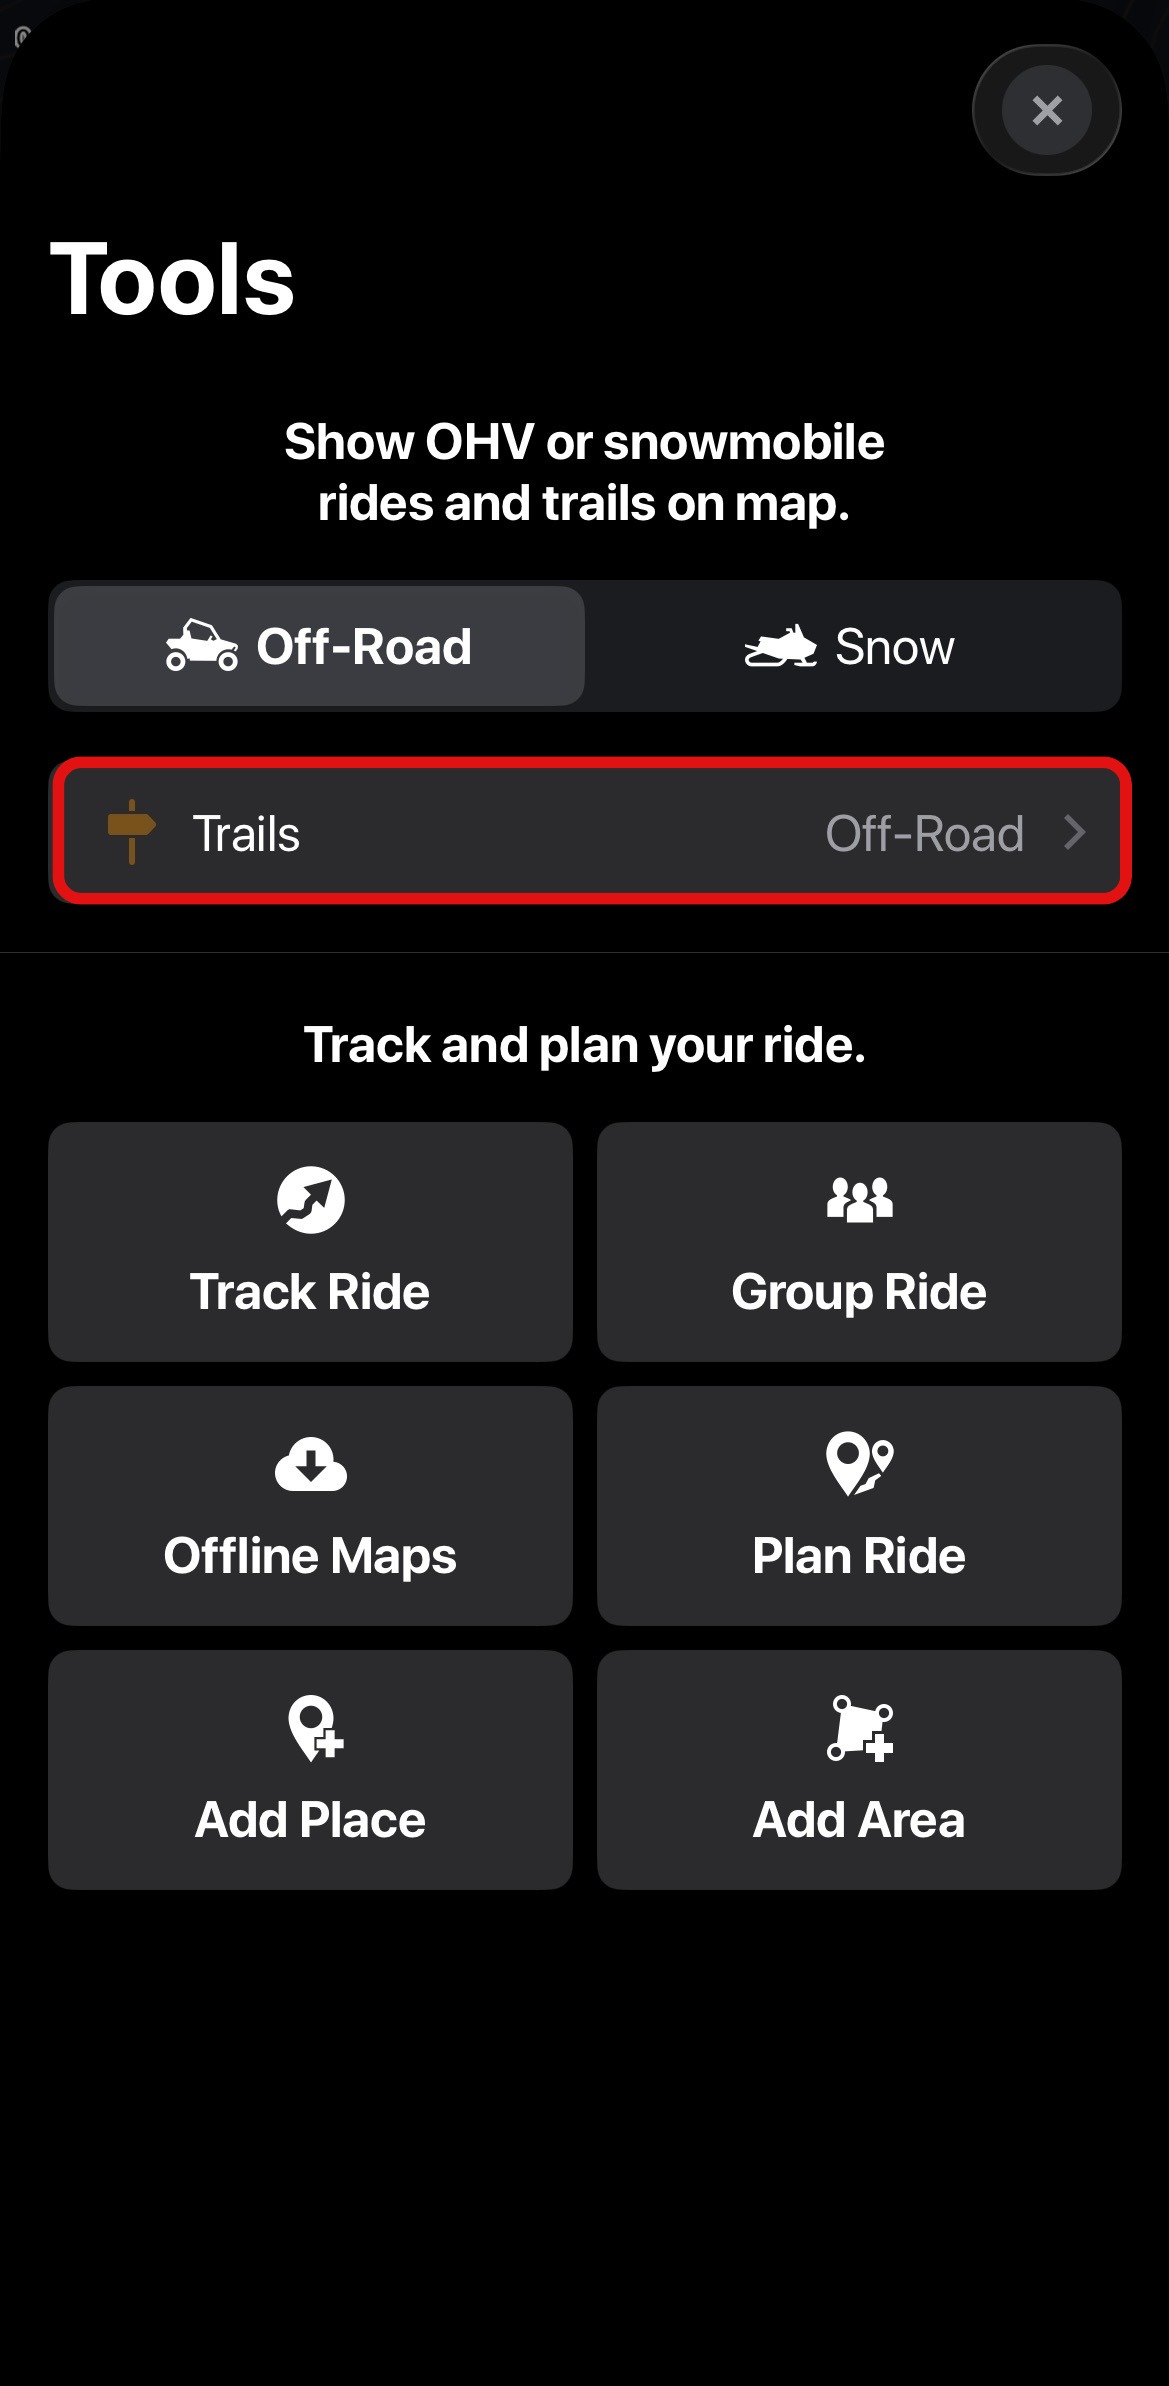
For a look at the different trail types, select TRAILS.
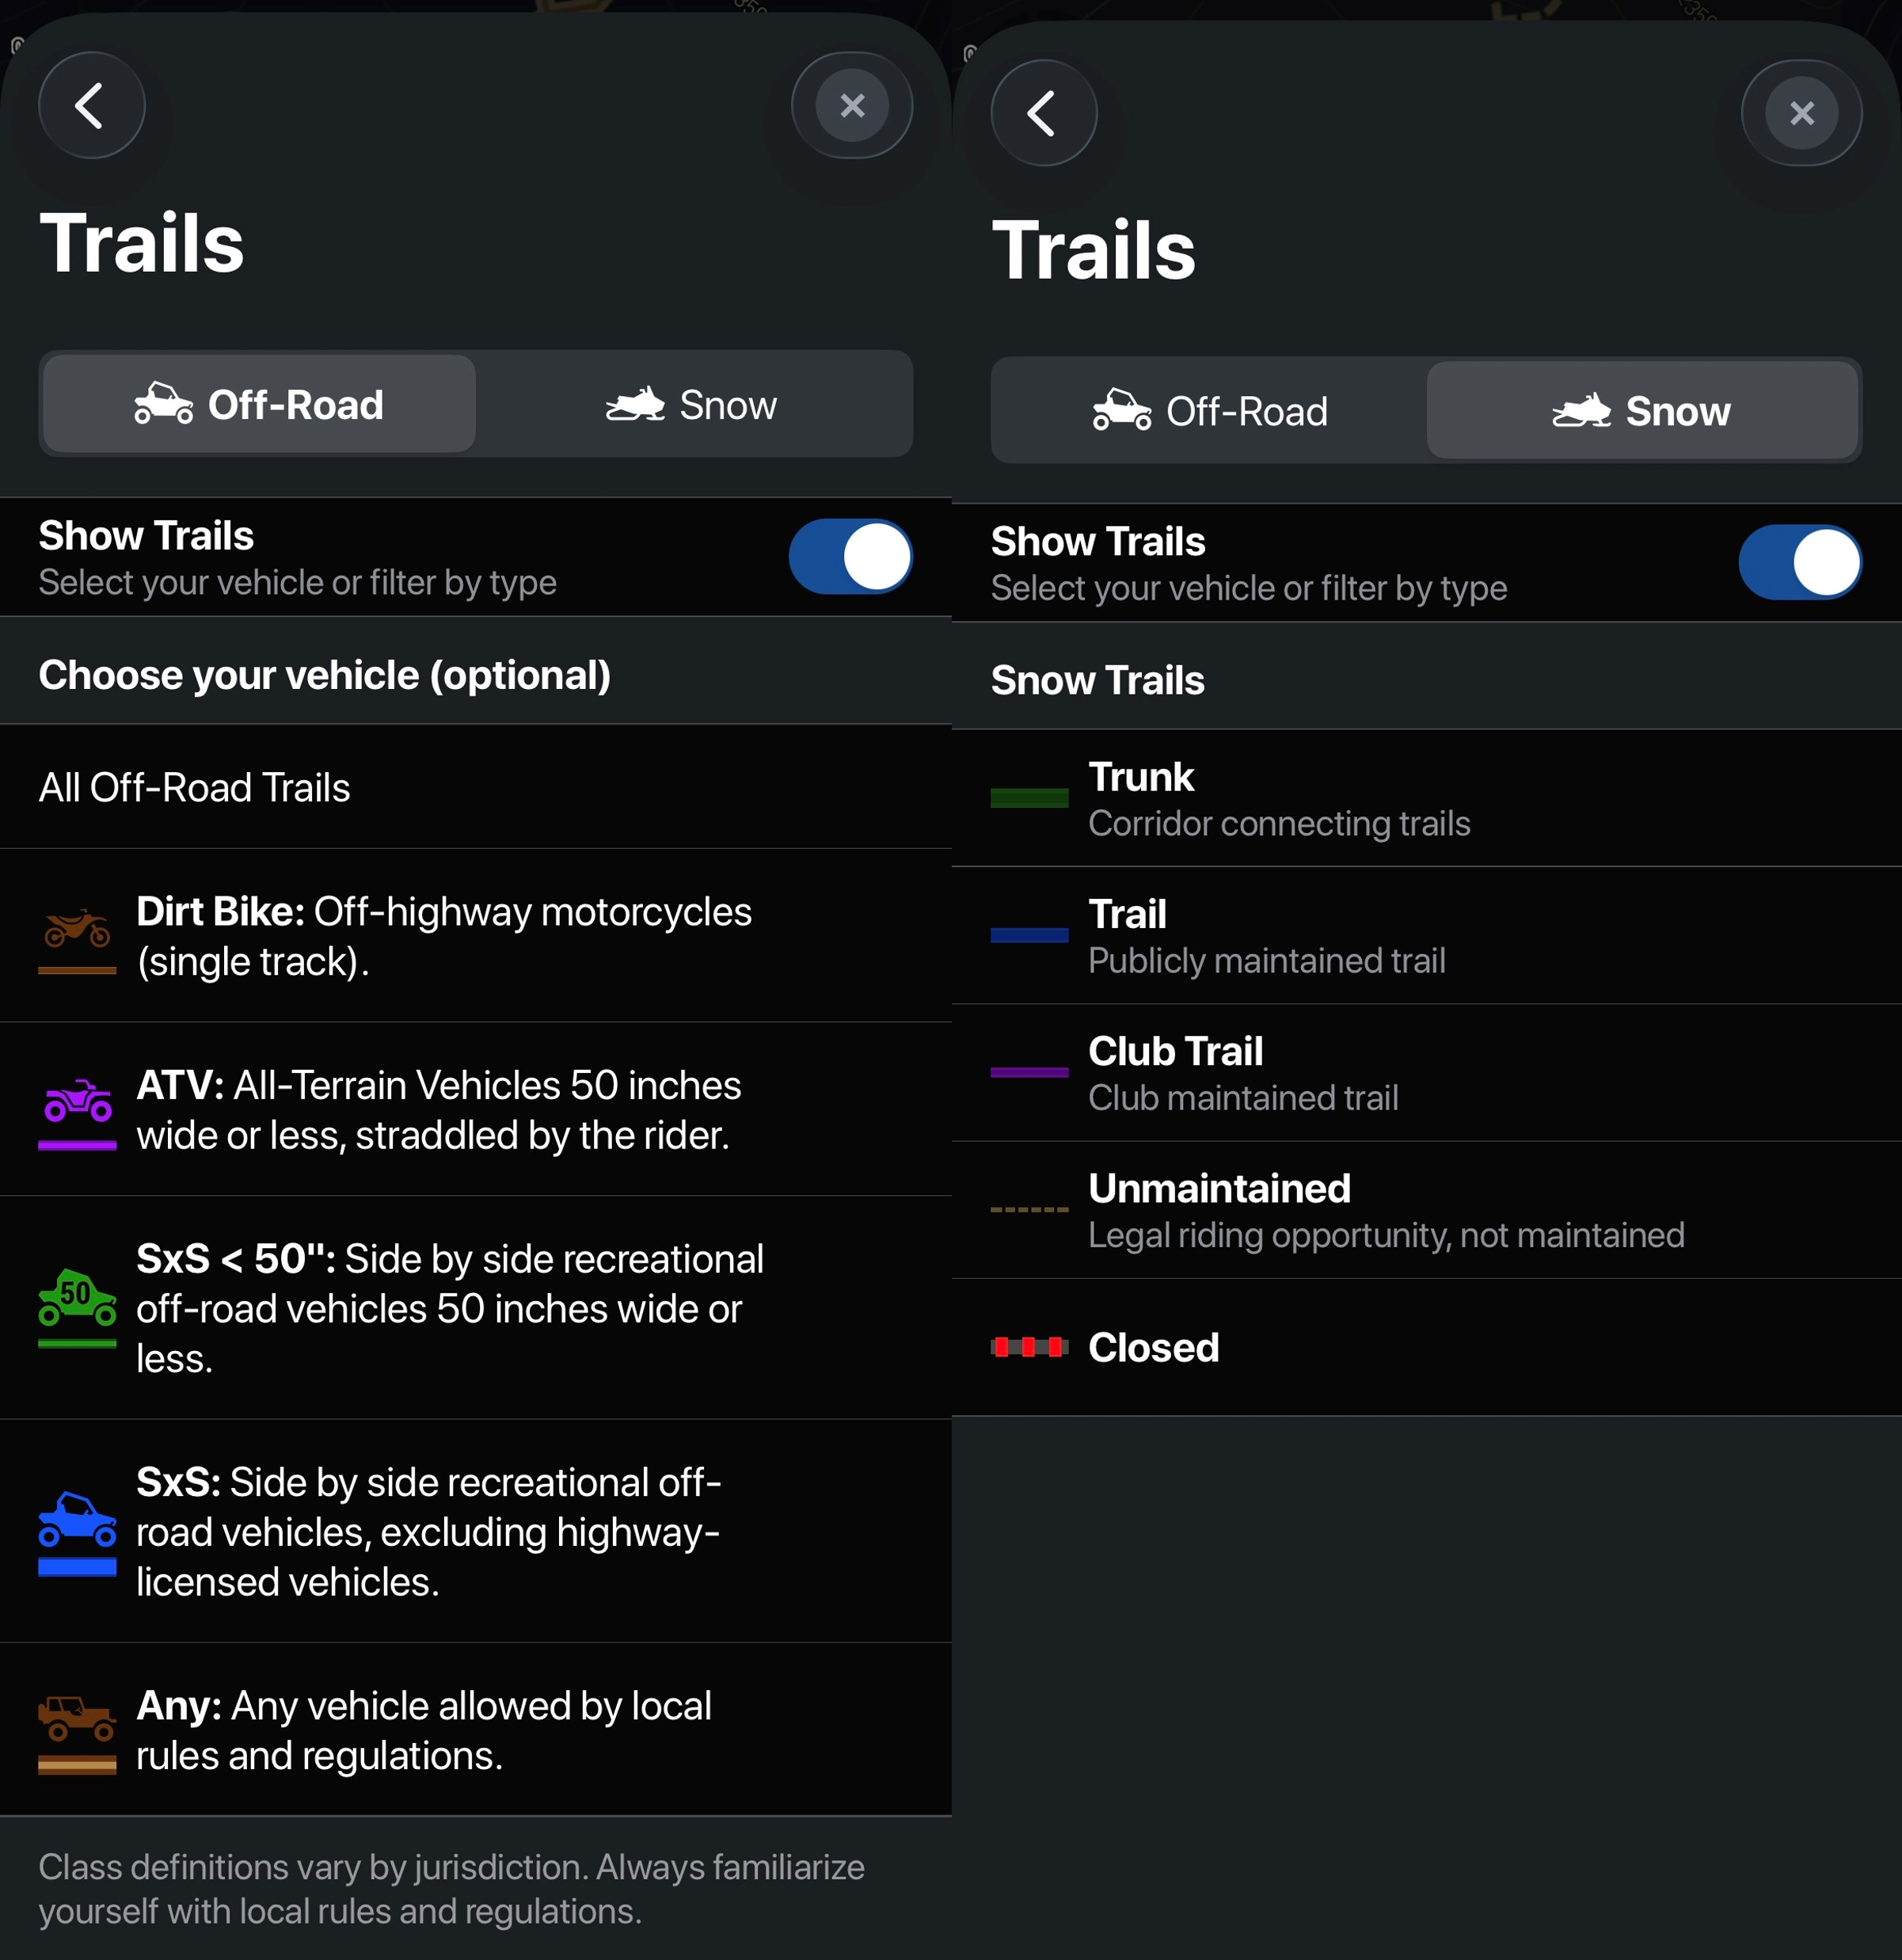
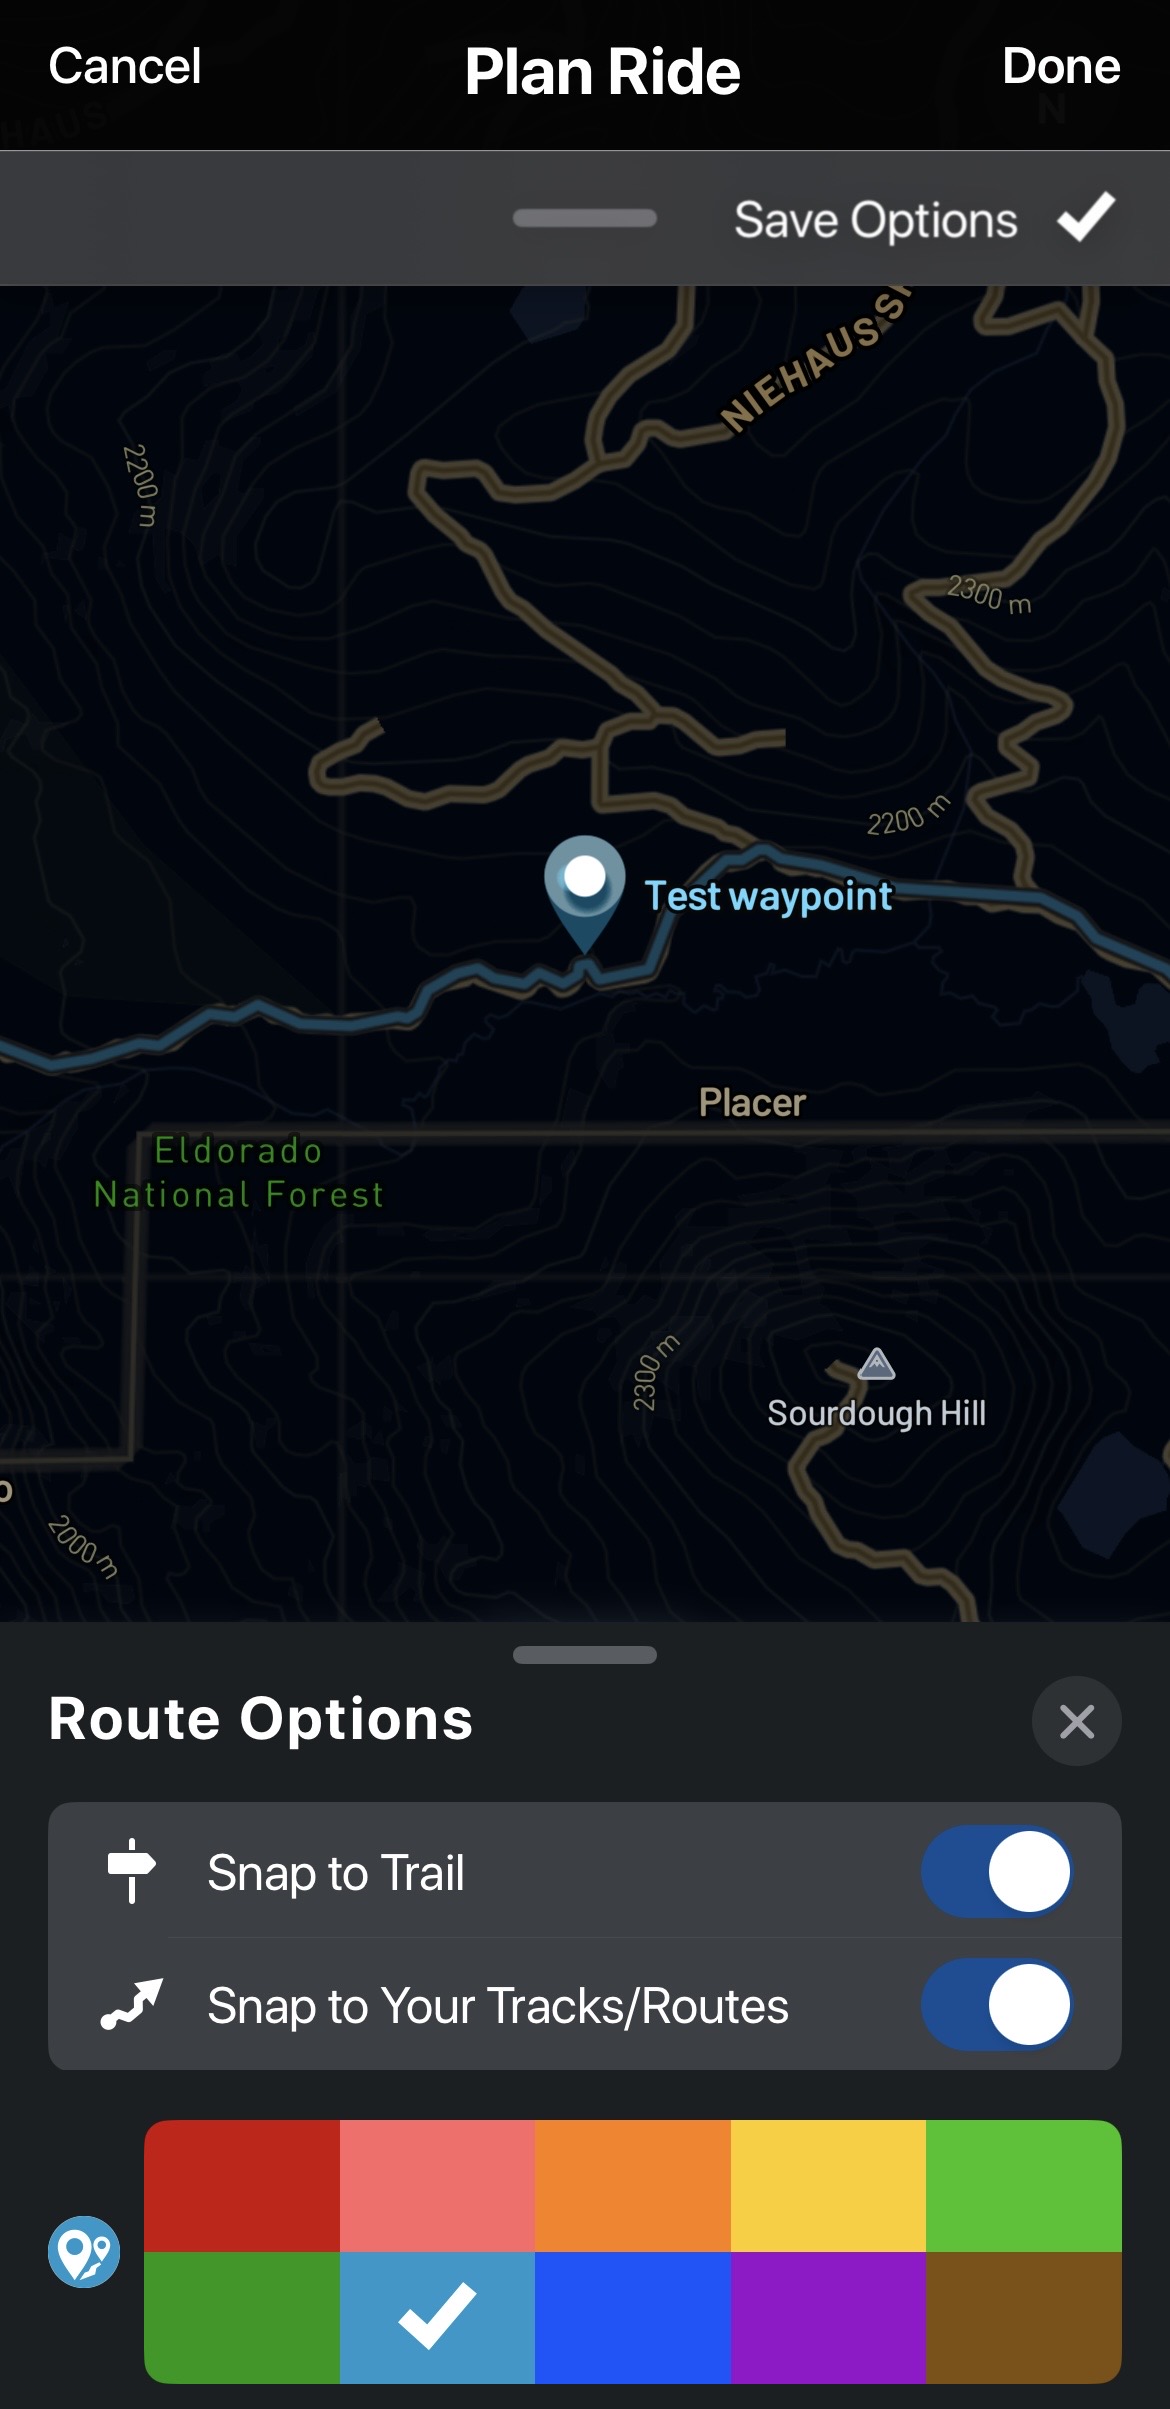
Note: Be sure the "Snap to Trail" option is enabled unless you wish to plan the route manually.
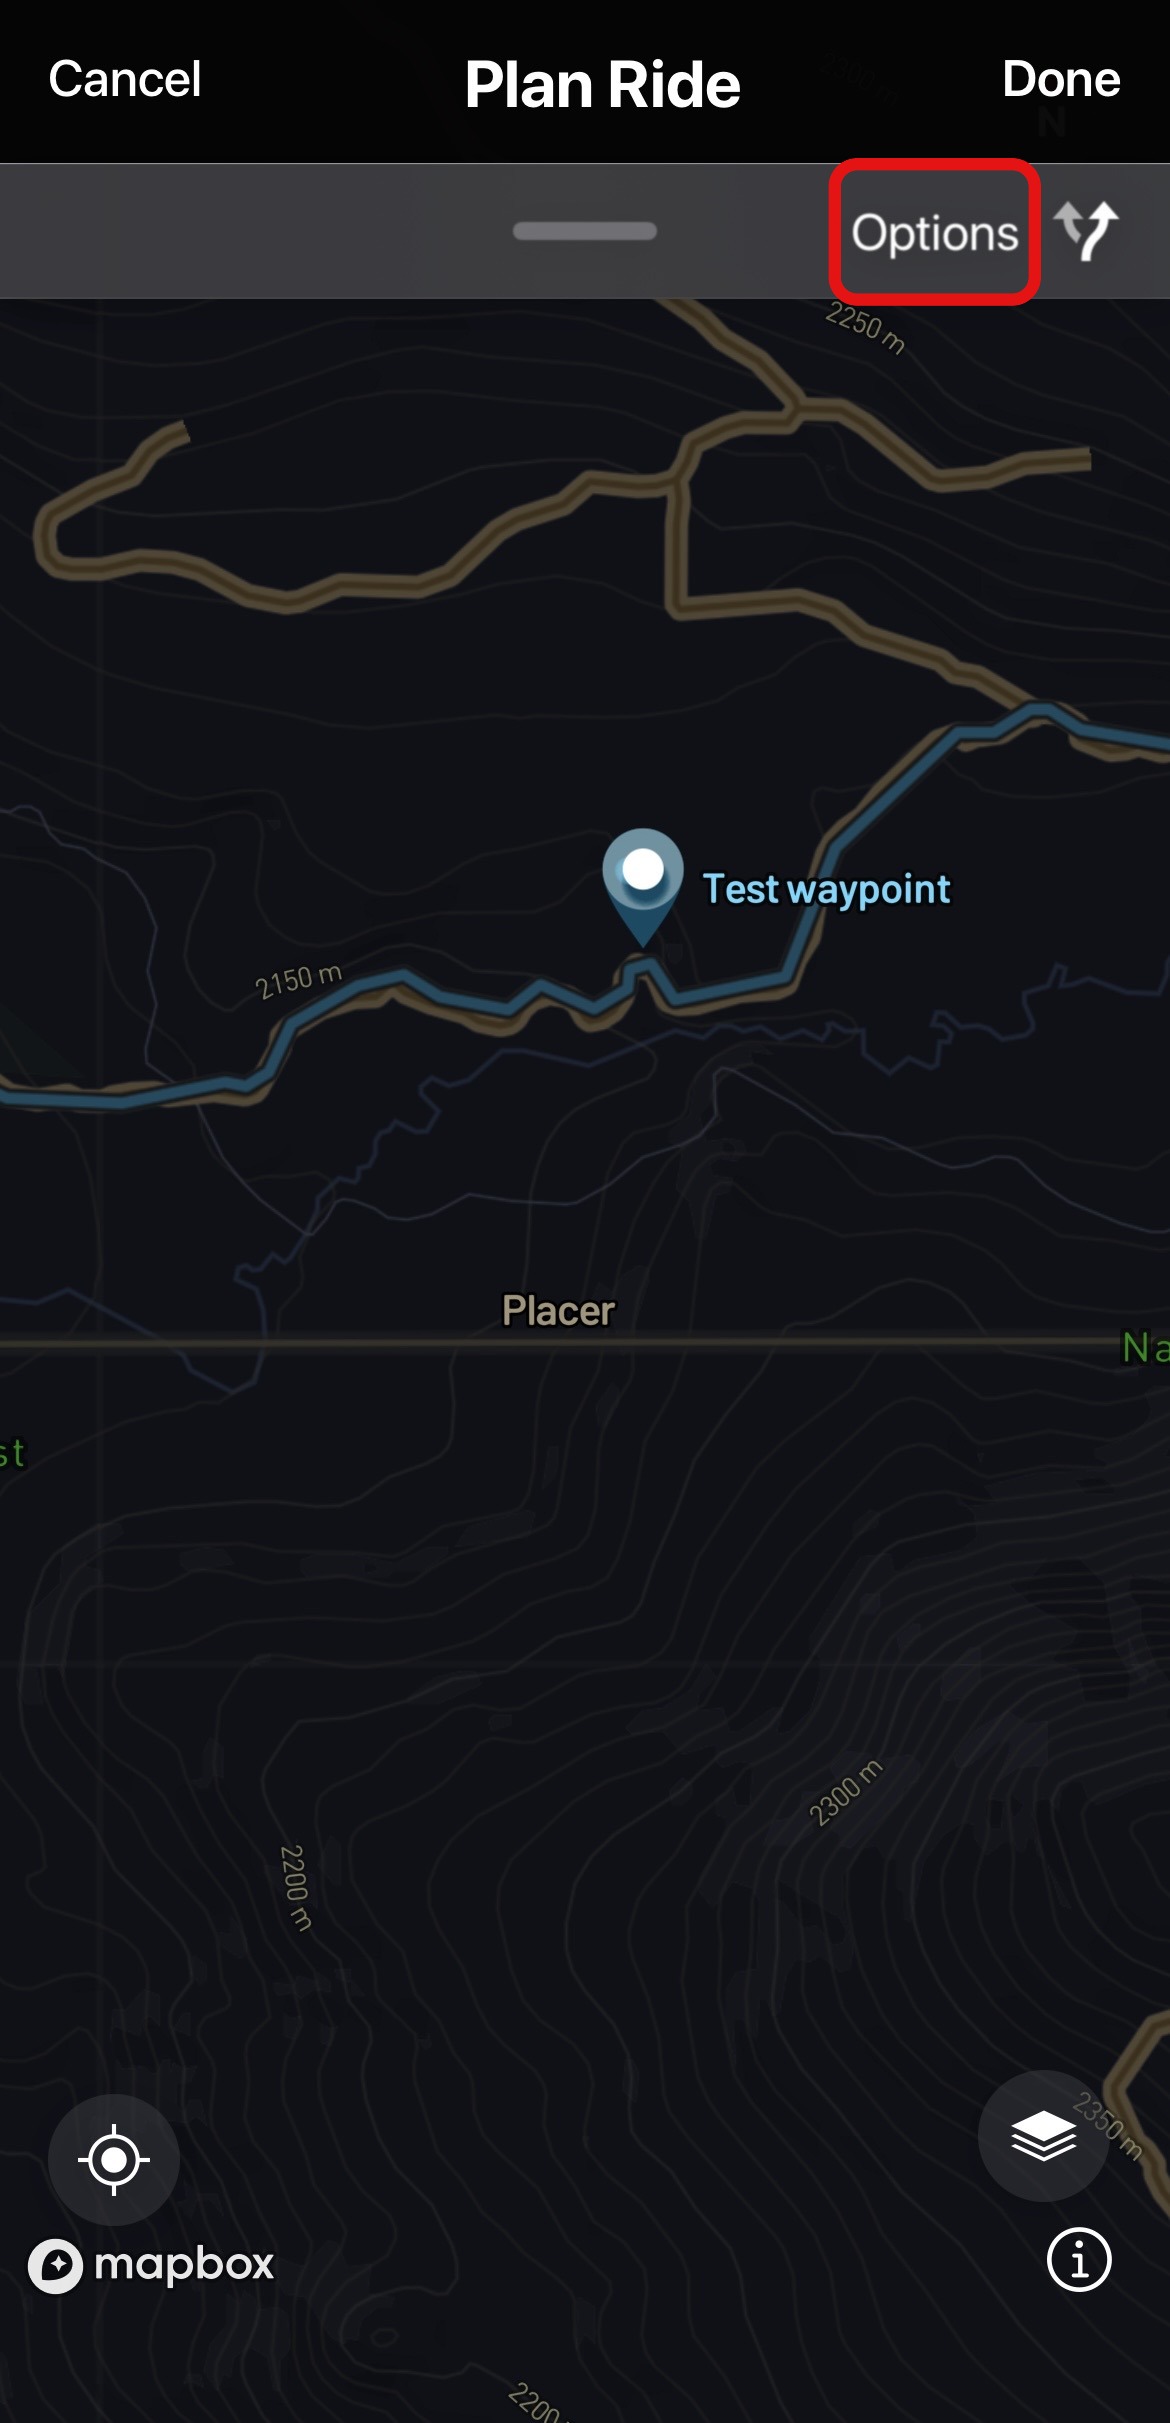
This can be enabled after selecting 'PLAN RIDE' under 'Options'. Here, you can also change the color of your planned ride. Once complete, select DONE.
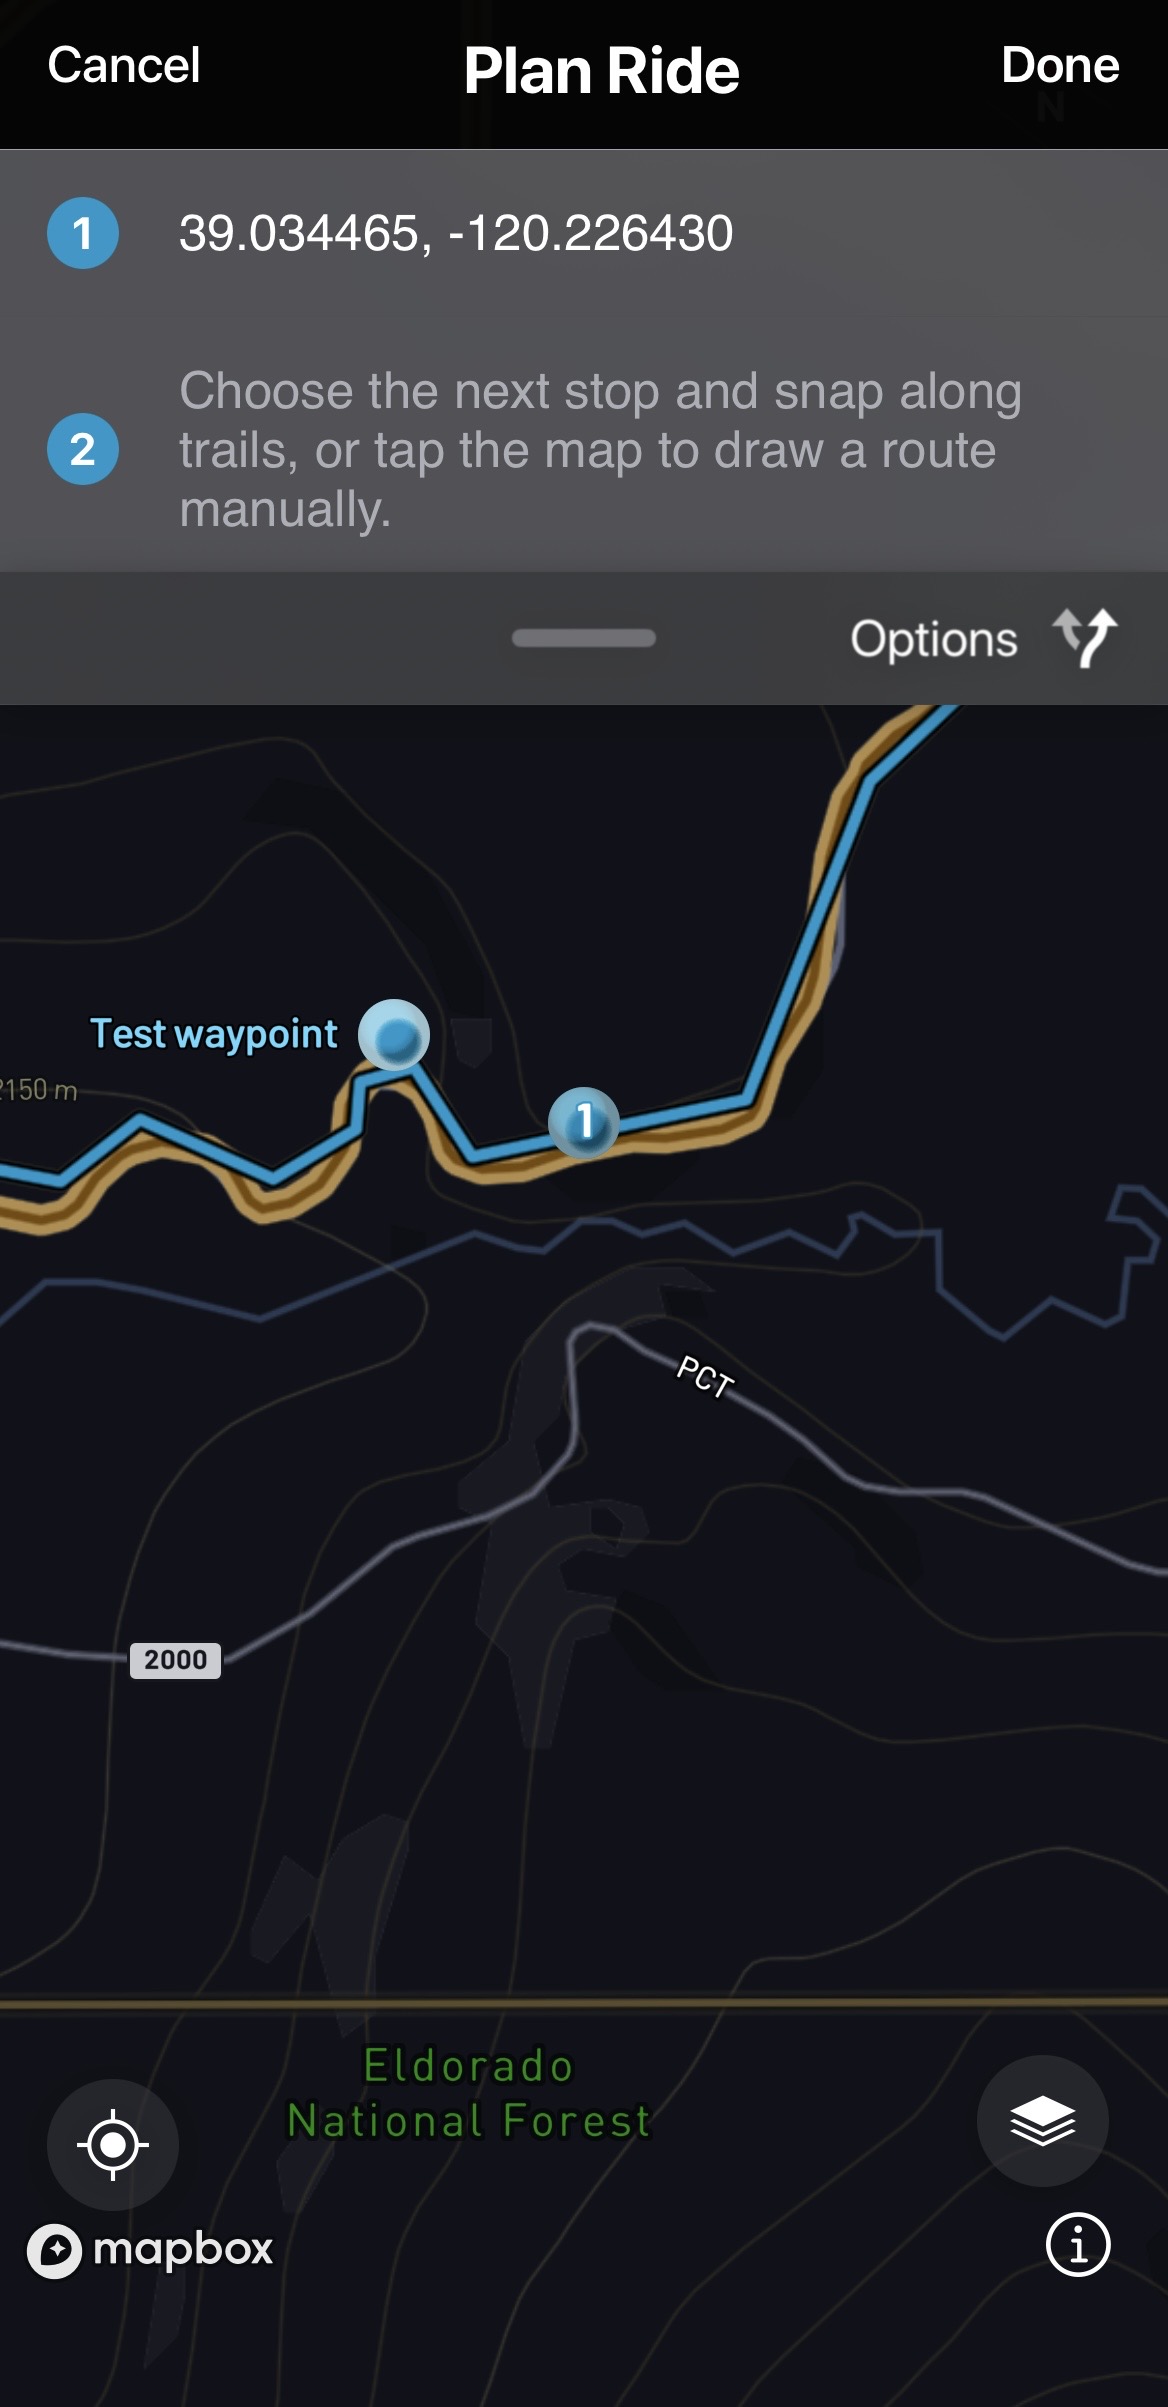
5. Tap the map to drop a waypoint or search for a location to choose where the ride will begin. Note: Start and end points can be on or off the actual trail, but they must be within 500 meters of a trail for routing to work.
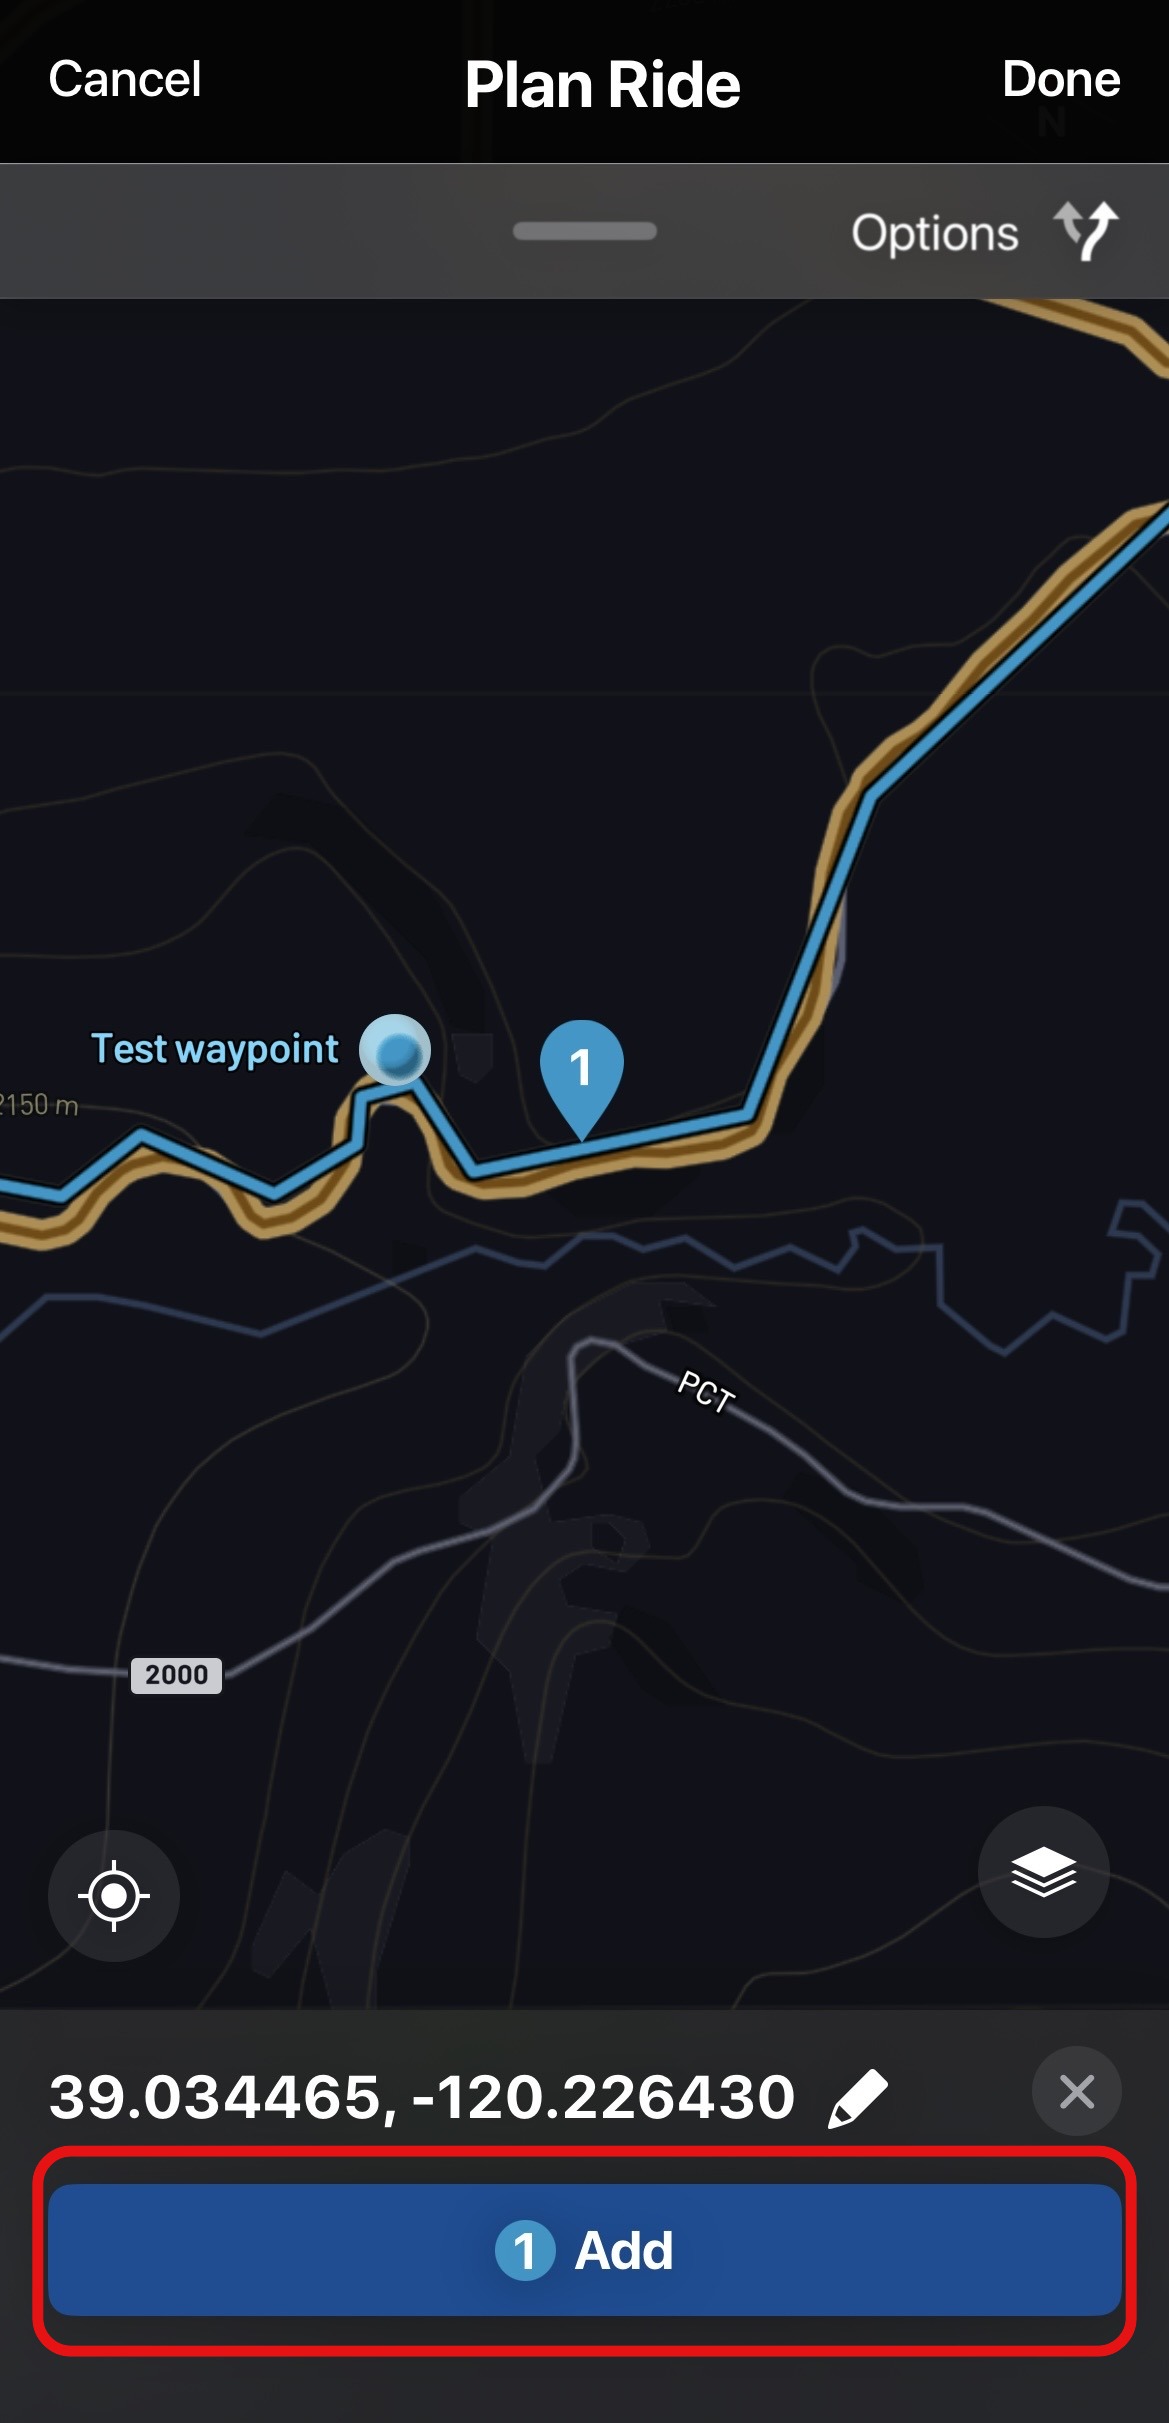
When satisfied with your starting point, press ADD. The waypoint will be added to your ride.
6. Add the destination or another stop. Repeat this step until your route includes all the stops you desire.
To edit a route between one waypoint and another, click the line that connects them. Follow the directions to move the route to the desired position.
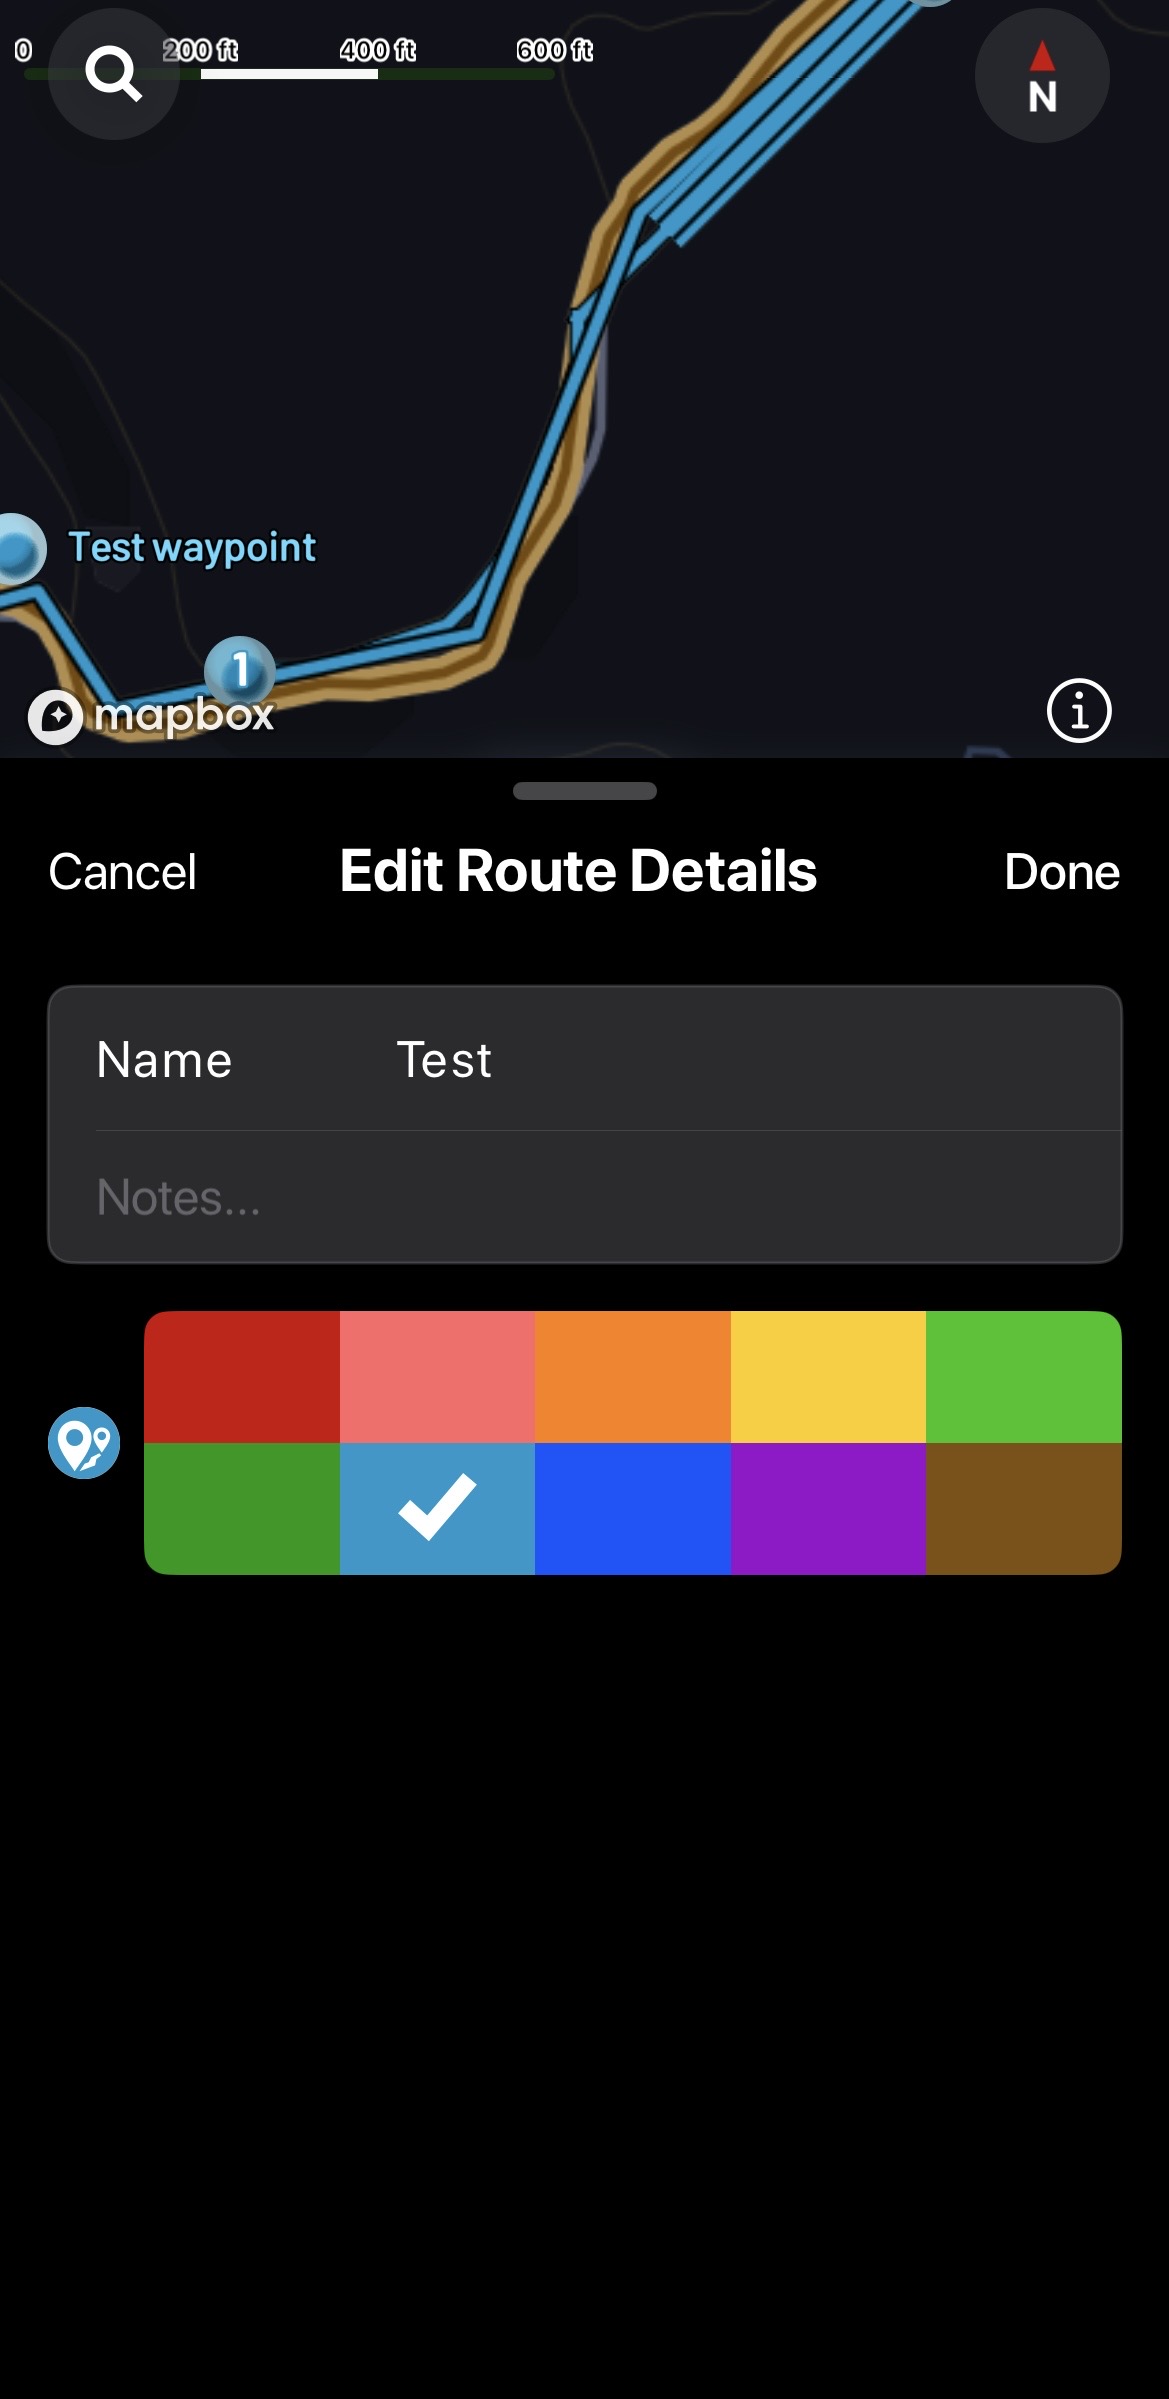
7. When satisfied with your ride, click DONE in the upper right hand corner. This will open a pop-up menu where you can name the route. You can also change the color for the route and any notes you wish to add.
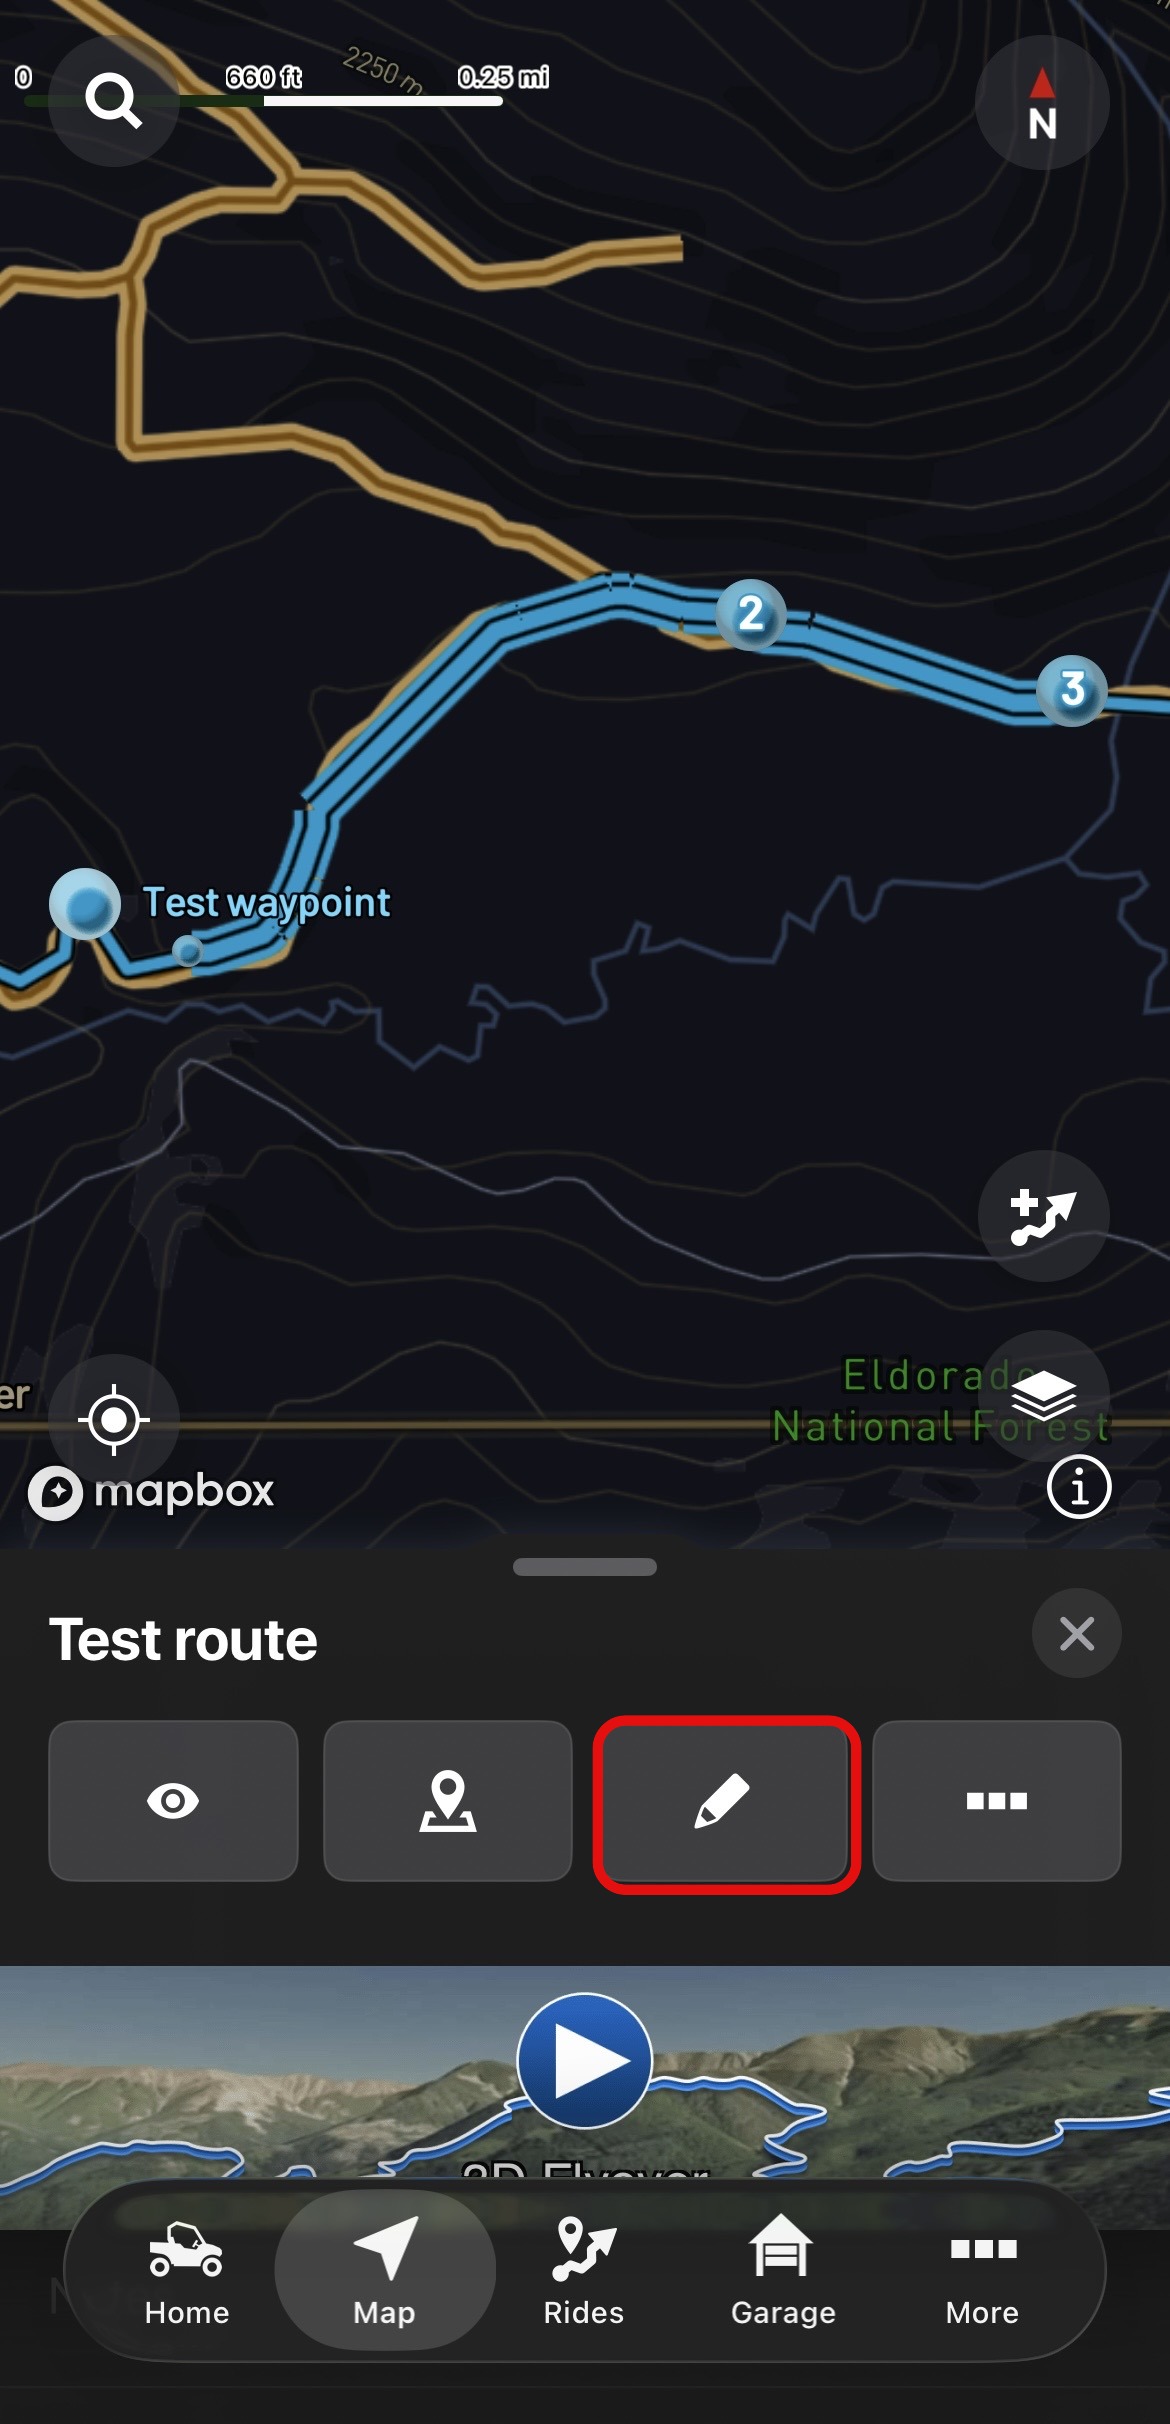
To edit the waypoints in your route, go to your planned ride and click the pencil icon.
Then select MODIFY ROUTE.

You can either select the waypoint from the list at the top or click on the number along the planned ride/route. Then, select the pencil icon and rename the waypoint as you wish.

8. When satisfied with your route, select DONE.
9. The route will save. You can access your new ride and other planned rides by navigating to the RIDES tab and selecting ROUTES.
Uploading a Route to the Vehicle
There are several ways to load your planned route to the vehicle display. On vehicles with a 2019 and newer 7" Display powered by RIDE COMMAND, you can transfer a ride to your vehicle via USB or tethering. For instructions on syncing data between the RIDE COMMAND Cloud and your vehicle with your phone, read Syncing RIDE COMMAND Data.
To download and transfer a route via USB, follow these steps.
1. Go to the RIDES/PLACES tab on the RIDE COMMAND homepage and then select ROUTES.
2. Select your ride(s) and choose DOWNLOAD in the pop-up menu.
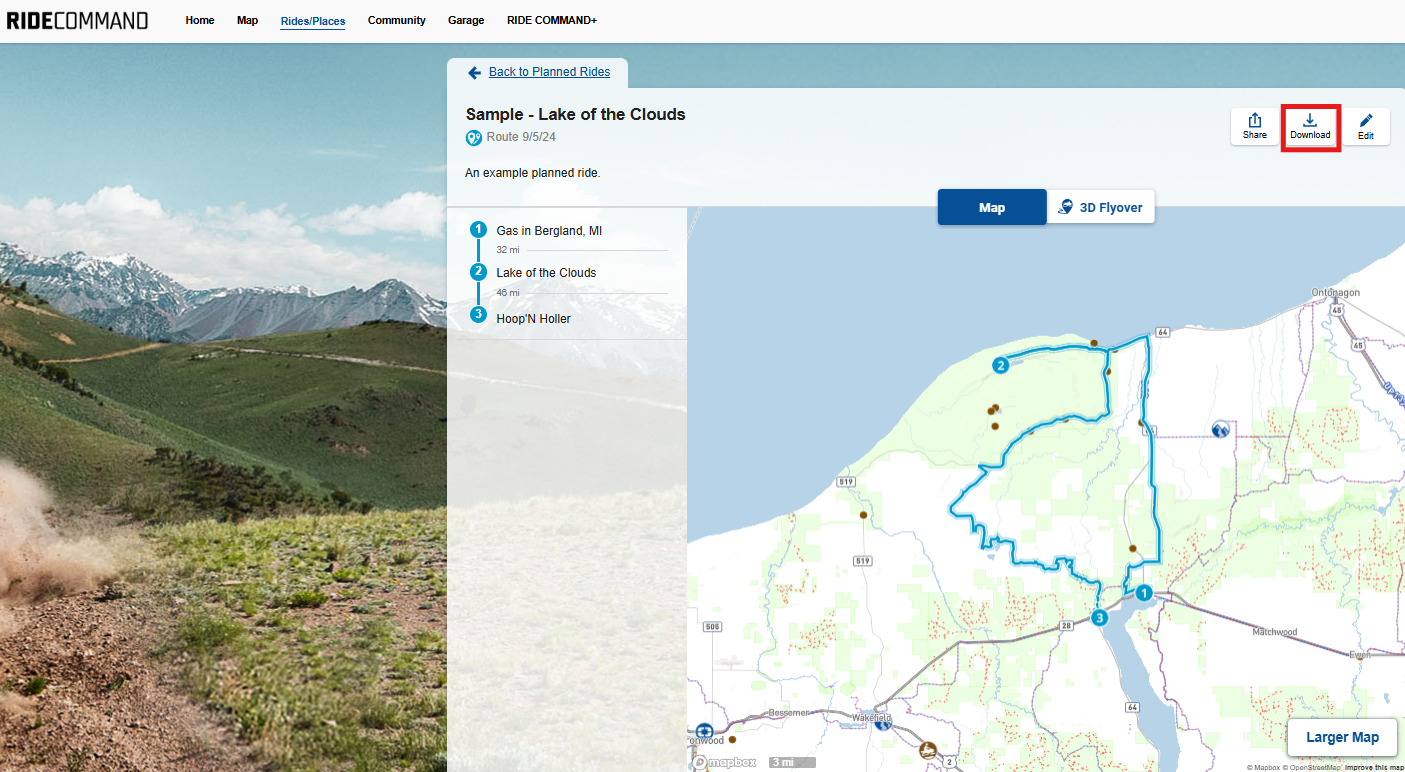
The file will download as a GPX file, shown below.

3. Once downloaded, transfer the file to an exFAT® or FAT32 formatted USB flash drive. For help, read Formatting a USB to FAT32 or exFAT®.
Uploading a Route to the Vehicle from Your Computer
1. Turn your vehicle's key ON to boot up the display. Note: You do not need to start the vehicle.
2. Plug the USB flash drive into the USB port. The location of your USB port depends on your vehicle. Consult your Owner's Manual to determine the location.
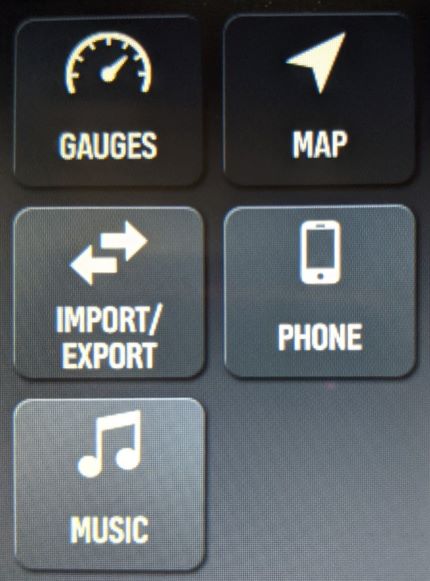
3. Pull down the Polaris button to enter the Settings menu.
4. On the left side, select IMPORT/EXPORT.
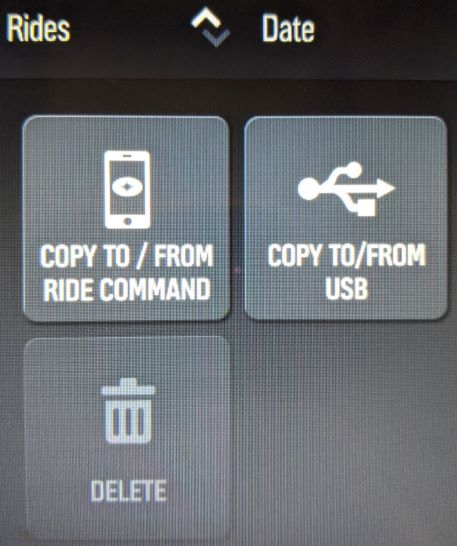
5. On the next screen, select COPY TO/FROM USB on the right side.
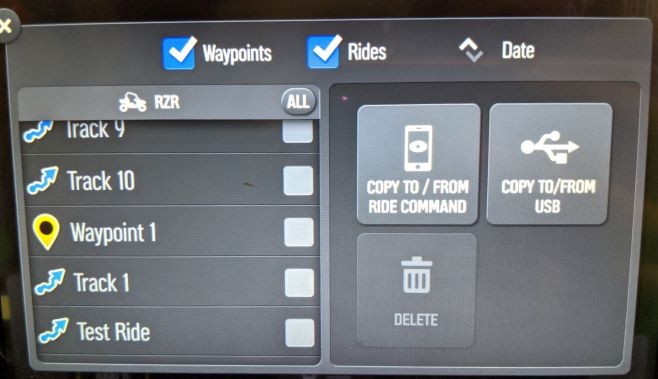
5. The left side of the next screen will display rides and waypoints currently on your vehicle. The right side will display files from your USB. Locate the file you would like to transfer onto your vehicle and press the arrow button. The file will be added to the bottom of the left list.
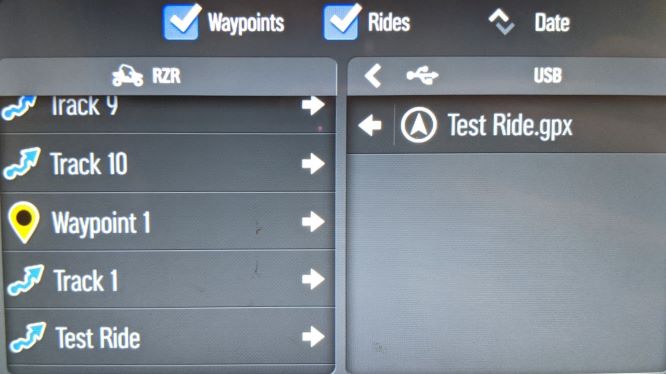
Your planned ride can now be accessed on your display.
6. Exit the menu and safely remove your USB.
7. To view your planned ride on your display, pull up the map icon on the bottom of your display. Select RIDES & WAYPOINTS.

8. On the next screen, select the ride from the list on the left side of the screen. Your ride will appear on the screen.
9. Click the Navigation button to begin your planned ride.
Error Messages and Troubleshooting
If an error occurs while importing your ride, perform one or all of the following actions to resolve the issue.
- Remove and reconnect the USB securely.
- Make sure the files are not inside a folder on the flash drive.
- Remove any unnecessary files.
- Try using a different USB.
For help organizing the rides and waypoints, read Using Collections on RIDE COMMAND.
For information about your vehicle's touchscreen display, read the 7" Display Powered by RIDE COMMAND User's Guide or the 7" ATV Display Powered by RIDE COMMAND User's Guide.
To browse all RIDE COMMAND articles, read Guide to RIDE COMMAND for Off-Road Vehicles.
The Polaris App is available on the App Store® for iPhone® and iPad® and on Google Play®.
Visit the RIDE COMMAND website for additional information about features, displays and software/map updates.
Mapboxsm is a service trademark of Mapbox, Inc.
OpenStreetMapsm is a service trademark of OpenStreetMap Foundation
Google Play® is a registered trademark of Google LLC
App Store®, iPad® and iPhone® are registered trademarks of Apple Inc.
Bluetooth® is a registered trademark of Bluetooth Sig, Inc.
exFAT® is a registered trademarks of Microsoft Corporation
Unless noted, trademarks are the property of Polaris Industries Inc.
© 2026 Polaris Industries Inc.


