

Before updating the 7S Display powered by RIDE COMMAND on your Polaris snowmobile, always export your existing rides and waypoints to a USB drive to avoid losing them.
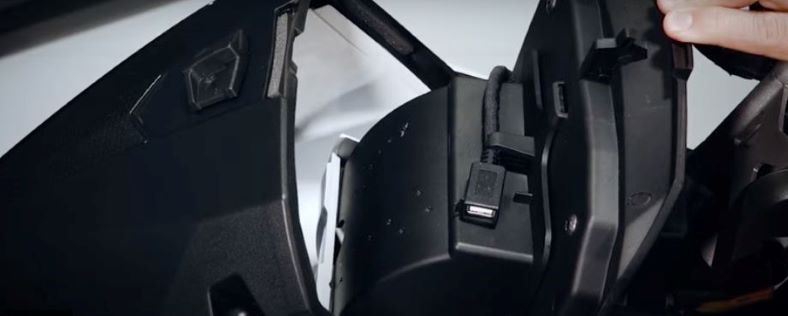
Software and map updates for the 7S display require the use of the snowmobile's USB port. The USB port is located in the storage compartment behind the 7S display.
Updating Software
For software updates to your 7S display, Polaris recommends using a SanDisk® or similar USB flash drive with a minimum of 4GB in available memory, formatted using the FAT32 or exFAT® file systems. For best results, remove all files from the flash drive before starting the update process.
To update the software on your 7S display, follow these steps.
On your computer:
1. Go to the RIDE COMMAND website.
2. Log in to your RIDE COMMAND account or create a new account.
3. Using the Vehicle Identification Number, add your Polaris vehicle to your Garage.
4. Locate and download the latest software to a USB flash drive (8+GB).
On your vehicle:
1. Firmly connect the USB flash drive to the USB cable and power up your vehicle.
2. On the RIDE COMMAND touchscreen, select the ALL SETTINGS menu by tapping the Polaris icon at the top of the screen.
3. Select GENERAL and then UPDATE SOFTWARE.
4. Select the file you wish to load (use the date listed in the file name to determine the most recent file).
5. Select YES to upload the software file. The display will restart automatically. Do not remove the USB flash drive until the display has fully restarted.
Error Messages
If an error occurs while updating your software, perform one or all of the following actions to resolve the issue:
1. Remove the USB flash drive and reconnect it securely.
2. Make sure the display files are not inside a folder on the flash drive.
3. Make sure only the display files are on the flash drive. Remove any other files if necessary.
4. Try using a different USB flash drive.
Updating Maps
For map updates to the 7S display, a 32GB USB drive is required. A USB 3.0 drive is highly recommended. The USB drive must be formatted to exFAT® before copying the map file onto it. For trail updates, a 4GB drive formatted to FAT32 can be used.
To update the maps on your 7S display, follow these steps:
1. Go to the RIDE COMMAND website and download the map update to a USB flash drive.
2. Firmly connect the USB flash drive to the USB cable and power up your vehicle.
3. On the RIDE COMMAND touchscreen, select the ALL SETTINGS menu by tapping the Polaris icon at the top of the screen.
4. Select GENERAL and then UPDATE MAPS/TRAILS.
5. Select the file you wish to load.
6. Select YES to upload the file. The display will restart automatically. Do not remove the USB flash drive until the display has fully restarted.
Note that RIDE COMMAND does not support third-party maps.
For more information, read the 7S User Guide and 7S Quick Start Guide.
Visit the RIDE COMMAND website for updates.
Sandisk® is a registered trademark of SANDISK LLC
exFAT® is a registered trademark of Microsoft Corporation
Unless noted, trademarks are the property of Polaris Industries Inc.
© 2021 Polaris Industries Inc.


